Inside the LEO Doghouse: The Art of Expander Cycle Engines

If you go back several generations on my mother’s side of the family, you will find a famous artist named Charles Frederick Kimball.  Also on my mother’s side of the family, in a different branch, a couple of generations later, there was a professional commercial artist.  On my father’s side, my grandmother was a wonderful artist who painted mostly landscapes of the Mohawk and Hudson River valleys in upstate New York.  And, of course, I’m married to an extremely talented artist.  You would think with those bloodlines and that much exposure, I’d have a just bit of artistic ability myself.  You would be wrong.  I love art.  I just can’t make it.

blog1

The closest thing that I come to visual expression is confined to Microsoft PowerPoint creations.  However, within that narrow arena, particularly when it comes to engineering subjects, there is still fun to be had.  What we’re going to do for this article is undertake one of my favorite pseudo-artistic hobbies and play with expander cycle engine schematics.

So, let’s start with a simple, happy little cycle called the Closed Expander Cycle.  Most of what you need to know about this cycle is in the name.  First, it is closed.  That means that all of the propellants that come into the engine leave by going through the throat of the main combustion chamber thereby yielding the greatest chemical efficiency available.  Later, we’ll see that the opposite of “closed” is “open.”  Second, it is an expander.  That means that turbomachinery is driven by propellants that picked up heat energy from cooling circuits in the main combustion chamber and nozzle.  Typically, expander cycle engines use cryogenic propellants so that when these propellants are heated they change from liquid-like fluids to gas-like fluids.  Turbines very efficiently make use of gas-like drive fluids.  (Note that I keep referring to “fluids” rather than simply liquids and gases.  That’s because it’s usually a good idea to deal with supercritical fluids in cooling tubes or channels.  Phase changes can be unpredictable and lead to some odd pressure profiles.)

closedexpander

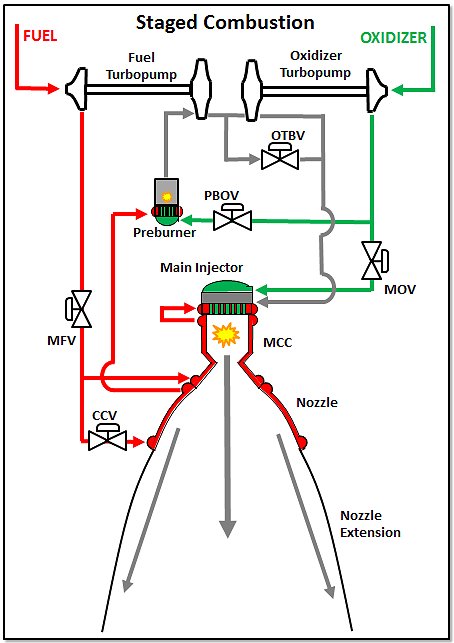
Above is a Microsoft PowerPoint masterpiece illustrating the Closed Expander Cycle rocket engine.  Fuel and oxidizer come in from the stage and are put through pumps to raise their pressure.  On the fuel side, the pump discharge is routed through the main fuel valve (MFV) to the nozzle and the main combustion chamber (MCC) cooling jackets.  I’ve not shown the actual routing here.  Typically, the MCC is cooled first and then, the now warmer fuel is used to cool the nozzle.  The heat loads in the MCC are significantly higher than those in the nozzle.  But whatever is the exact routing of the cooling fluid, the discharge, now full of energy picked up from the process of cooling, is fed into the turbines.  The oxidizer turbine bypass valve (OTBV) shown in the diagram is a means for controlling mixture ratio by moderating the power to the oxidizer turbine.  In some cases, if you have only one mixture ratio setting for the engine, you might be able to put an orifice here rather than a valve.  The turbines are driven by the warm fuel and then the discharge of the turbines is fed through to the main injector and then into the combustion zone.  On the oxidizer side, the routing is much simpler.  The oxidizer pump discharge is plumbed through the main oxidizer valve (MOV) directly into the main injector.  Within the MCC, you have the combustion of your propellants, the resultant release of energy, the generation of high-velocity combustion products, and the expulsion of these products through the sonic MCC throat and out the supersonic nozzle.  Ta-da, thrust is made!

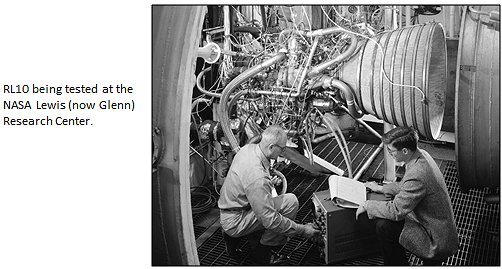
The closed expander is one of the most simple engine cycles that has ever been imagined.  The venerable RL10 engine first developed in the 1950s and still flying today is based on this cycle (with the slight twist that there is only one turbine and the pumps are connected through a gear box – thereby eliminating the need for the OTBV).  This simplicity is both the strength of the cycle and also it’s limiting feature.  Consider the fact that all of the fuel – hydrogen in the case of most expanders – gets pushed all of the way through the engine to finally end up getting injected into the combustion chamber.  All that pushing translates to pressure drops.  It means that the turbines don’t have that much pressure ratio to deal with in terms of making power for the pumps.  In other words, the downstream side of the turbine is the lowest pressure point in the cycle and that’s the combustion chamber.  The result is that your chamber pressure can’t be very high.  That means that the throat of your MCC is relatively large and then that means the expansion ratio of your nozzle and nozzle extension start to get limited simply by size and structural weight.

blog3

Also, note that all of the power to drive the entire cycle is provided by the heat picked up by the fuel in the MCC and nozzle cooling channels.  This then becomes a limiting factor in terms of the overall power and thrust-class of the engine.  As an engine gets bigger, at a given chamber pressure, the thrust level increases to the second power of the characteristic throat diameter, but the available surface area to be used to pick up heat to power the cycle only increases by that characteristic diameter to the first power.  In other words, thrust is proportional to “D-squared” but, to a first order, turbine power is proportional to “D.”  Thus, you can only get so big before you can’t get enough power to run the cycle.  One means for overcoming this is to make the combustion chamber longer just to give yourself more heat transfer surface area.  The European engine called the Vinci follows this approach.  But even this approach is limiting if taken too far since a chamber that is too long makes for less efficient combustion and, of course, a longer combustion chamber also starts to get awfully darn heavy.

So, how big can a closed expander cycle rocket engine be?  Well, that’s a point of recurring dispute and debate.  I can only give my opinion.  I would say that the closed expanding cycle engine most useful and most practical when kept to a thrust level of less than approximately 35,000 pounds-force.

Getting back to the notion of artistic expression, what then are the possible variations on the theme of the expander cycle engine?  Well, the themes and variations are used to explore and potentially overcome perceived shortfalls in the Closed Expander Cycle.  The first in this series is the Closed Split Expander, the portrait of which is below:

closedsplitexpander

The shortfall being addressed here is the fact that in the Closed Expander Cycle all of the fuel was pushed all over the engine resulting in large pressure losses.  In this case, some – usually most – of the fuel is pumped to a lower pressure through a first stage in the pump and then another portion is pumped to a higher pressure.  Thus, the fuel supply is “split” and that’s the origin of the name.  It is this higher pressure stream, routed through the fuel coolant control valve (FCCV) that is pushed all over the engine to cool the MCC and nozzle and to drive the turbines.  The lower pressure stream is plumbed directly into the main injector.  The theory is that by not requiring all of the fuel to be pumped up to the highest pressure, you relieve the power requirements for the fuel turbine.  It is always the hydrogen turbopump that eats up the biggest fraction of the power generated in the cycle so this is an important notion.

Does this cycle help?  Yes, some.  Maybe.  The balance of how much to split, what that split does to the efficiency of the heat transfer (less flow means possibly lower fluid velocities, lower velocities means lower heat transfer, lower heat transfer means less power…) makes it not always clear that you gain a whole lot from the effort of making the cycle more complex.  The portrait, however, is nice, don’t you think?  It has a realistic flair, a mid-century industrialist-utilitarian feel.

Next, wishing to express yourself, you can address the age-old issue of the intermediate seal in the oxidizer turbopump.  Take a good look at the first two schematics presented here.  You will see that the oxidizer pump is being driven by a turbine using fuel as a working fluid.  This is a very typical situation with rocket engines, whether they’re expander cycle engine or other cycles.  For example, this is the situation that you have in the RS-25 staged-combustion cycle engine and in the J-2X gas-generator cycle engine.  What that situation sets up, however, is a potential catastrophic failure.  You have fuel and oxygen in the same machine along with spinning metal parts.  If the two fluids mix and anything rubs, then BOOM, you have a bad day.  So, inside oxidizer pumps you usually have a complex sealing arrangement that includes a continuous helium barrier purge to keep the two fluids separate.  For the next expander cycle schematic, however, we can eliminate the need for this complex, purged seal.

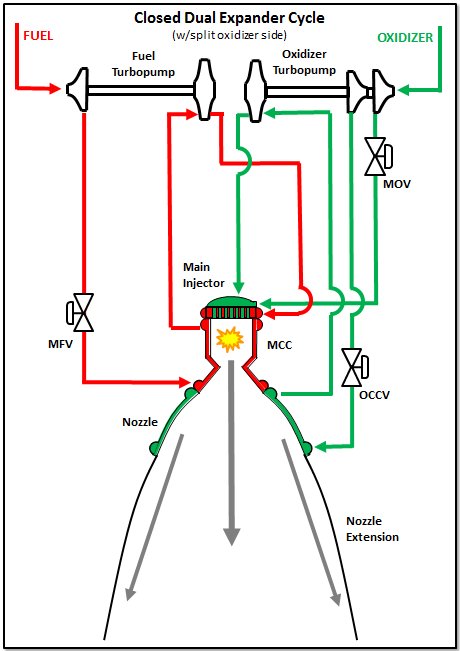
 closeddualexp

This is a Closed Dual Expander Cycle.  It is still “closed” in that everything that comes into the engine leaves through the MCC throat.  The new part is that it is “dual” in that we now not only use the fuel to cool, but we also use the oxidizer.  Thus, we use heated fuel to drive the fuel turbopump and heated oxidizer to drive the oxidizer turbopump.  For this sketch, I’ve used a split configuration on the oxidizer side with a portion of the flow being pumped to a lower pressure and routed directly to the main injector and another portion pumped to a higher pressure, routed through the oxidizer coolant control valve (OCCV), to be pushed through the regeneratively cooled nozzle jacket and then through the oxidizer turbopump turbine.  I’ve done this since you’re likely running the engine at a mixture ratio (hydrogen/oxygen) of between 5 and 6.  You wouldn’t want to push that much oxidizer through the nozzle cooling channels or tubes.  Now, if you’re designing an expander with something like methane as your fuel so your mixture ratio lower, then maybe you can consider a non-split oxidizer side.

Note that with the dual expander approach I’ve gotten rid of the need for the purged seal package in the oxidizer pump and thus I’ve eliminated a potential catastrophic scenario (in the event of seal package failure).  However, I’ve accomplished that at the cost of some cycle complexity.  Also, cooling with oxidizer does not always make everyone happy.  Whenever you have a cooling jacket (either smooth wall or tubes), you always have the potential for cracking and leaking.  If you’re cooling with hydrogen, then a little leakage of extra hydrogen into a fuel-rich environment is a relatively benign situation.  It happens all of the time.  But what if you leak oxidizer into that fuel-rich combustion product environment?  Well, some studies have suggested that you’ll be fine, but it makes me just a little uneasy.  Then, also, you’re using heated oxidizer to drive your turbine.  It can be done, but using something like oxygen to drive spinning metal parts requires great care.  Under the wrong circumstances, a pure oxidizer environment can burn with just about anything as fuel, including most metals.  So, for all your effort to eliminate the seal package in the oxidizer turbopump, it’s not clear to me that you’ve made the situation that much safer.  However, despite these potential drawback, the schematic portrait itself has a certain baroque feel to it with the oxidizer side being positively rococo.

So, you’ve gone this far.  Why not take the final plunge?  Introducing the “Closed Dual Split Expander:”

closeddualsplit

By now, having stepped through the progression, you understand how it is “closed,” how it is “dual,” and how it is “split” (on both sides this time).  It’s not practical in terms of being a recipe for a successful rocket engine design for a variety of reasons balancing complexity versus intended advantages, but it’s an impressive schematic.  To me, it has a gothic feel, almost like a medieval cathedral with glorious flying buttresses and cascading ornamentation that just leaves you dazzled with details.

So, we’ve wondered off and into the weeds of making expander cycle portraits for the sake of their beauty rather than necessarily their useful practicality.  Let’s return to the more practical realm and question that which has been common to every cycle thus far presented.  It’s been the word “closed.”  Does an expander cycle engine have to be a closed cycle?  Of course not!  Once we’ve made that observation, we come to a very practical option.  Introducing the “Open Expander Cycle:”

open

 This biggest difference between this and every other previous schematic is the fact that the working fluid driving the turbines is dumped into the downstream portion of the nozzle.  This is a much lower pressure point than the main combustion zone.  The first thing that most people think when they see this cycle is that it must be a lower performance engine.  After all, you’re dumping propellant downstream of the MCC throat.  And, yes, that is an inherent inefficiency within this cycle.  Whenever you expel propellants in some way bypassing the primary combustion, you lose efficiency.  However, here is what you gain:  lots and lots of margin on your pressure budget.  Because I don’t have to try to stuff the turbine bypass into the combustion chamber, I can make my chamber pressure much higher.  In a practical sense, I can make it two or three times higher than in a simple closed expander cycle engine.  What that allows me to do is make the throat very small and that, in turn, provides for the opportunity for a very high nozzle expansion ratio within reasonable size and structural weight limits.  The very high expansion ratio means more exhaust acceleration and, in this way, I can get almost all of the way back to the same kind of performance numbers as a closed cycle despite the propellant dump.

blog12

Here, however, is the really cool part of the open expander cycle: I can leverage the high pressure ratio across the turbines such that I can get more power out of a given heat transfer level in the cooling jackets.  Up above, earlier in this article, I suggested that there was a practical thrust limit for closed expanders of approximately 35,000 pounds-force (my opinion) and this was due to the geometric relationships between thrust and heat transfer surface area.  For an open expander, I can design high-pressure-ratio turbines for which I don’t need as much heat pick up to drive the pumps.  Thus, I can make a higher thrust engine.  How high?  Well, my good friends from Mitsubishi Heavy Industries (MHI) and the Japanese Space Exploration Agency (JAXA) have designed a version of this cycle that gets up to 60,000 pounds-force of thrust and I’ve seen other conceptual designs that go even higher.  The folks in Japan already fly a smaller version of this cycle in the LE-5B engine that generates 32,500 pounds-force.  Note that they often refer to this cycle by another name that is very common in the literature and that’s “expander bleed cycle,” with the “bleed” portion describing the overboard dump into the nozzle.  I prefer the designation of “open” since it clearly distinguishes it from the “closed” cycles illustrated earlier.

We have just about reached the end of this article but we have not reached the end of possibilities with expander cycle engine schematics.  That’s what makes them fun and, in my mind, kind of like playing with art.  You can come up with all kinds of combinations and additions.  For example, what if you took an expander cycle and added a little burner?  Over and over I’ve said that the limiting factor for a closed expander is the amount of heat that you pick up in the cooling jackets.  Well, okay then, let’s add a small burner that has no other purpose than to make the turbine drive gas hotter.  The result looks something like this:

gg

This cycle has a gas generator but is not a gas generator cycle since the combustion products from that GG are not used to drive the turbines directly.  Rather, the GG exhaust is piped through a heat exchanger and then dumped overboard.  Yes, you lose a little of your performance efficiency because it’s no longer a closed cycle, but the GG flows can be small and what you get out of it is a boost in available turbomachinery power and therefore potential thrust.  That’s my own little piece of artwork to demonstrate and anyone can do it.

bobblog

Remember Bob Ross from Public Broadcasting?  I loved watching his show and, as I’ve said, I can’t paint worth a lick.  But his show was relaxing to watch and listen to and he was always so relentlessly supportive.  There never were any mistakes.  Everything could be made all right in the end.  And anyone could make pretty mountains and happy little trees.  I’d like to suggest that the same is true about my little hobby of assembling happy little expander cycle schematics.  No, most will probably never be built or fly and the schematic portraits will probably never grace the walls of MOMA, but that’s okay.  My artist grandmother used to tell me that sometimes the purpose of doing art was not necessarily found in the end product, but instead as part of the journey of creation.

Inside the LEO Doghouse: Light My Fire!

This article is the second part of the story focused on how we start rocket engines.  In the last article, we discussed the matter of delivering propellants – oxidizer and fuel – into the combustion zone.  In this article, we will discuss how these propellants become fire and smoke (…or steam).  Of course, the musical reference for which you’re waiting ought to be based on the title of this article and the song by the Doors.  Right?  Well, with all due respect to The Lizard King, I would prefer to reference here the immortal writings of The Boss:

dark1
I will now be so bold as to translate Mr. Springsteen’s words into functional advice for rocket engines.  Sitting around and crying or worrying about the world are both passive, energy-draining activities.  The only way to start a fire is to add energy, e.g., a spark, to the situation.  He’s absolutely right.  And I would just bet that you never knew that The Boss was a rocket scientist.

In an article about combustion instabilities many months ago, I used the image below to illustrate a situation of limited stability.  The ball sitting on top of the hill will sit there forever unless or until something disturbs it.  Give it a little bump, i.e., an insertion of energy, and the whole scenario rapidly changes with the ball speeding down the hill.

ball2

This is also how I think about the process of ignition for typical, non-hypergolic (see previous article) propellants.  You can have fuel and oxidizer sitting around, intermixing, but until it gets that bump of an insertion of energy, there is no combustion.  No combustion; no high-energy gas production.  No high-energy gases; no propulsion.

Let’s start from the other end.  For a moment, think about a fire in your fireplace.  Once you’ve got a good fire up and going as in the picture below, you don’t have to re-start the fire each time that you add a log.  The existing fire sustains itself so that the energy produced by the combustion in one moment is sufficient to continue the fire into the next moment using additional fuel (the wood) and oxidizer (from the air).

fire1

This is generally the case for rocket propellants as well.  Once the fire is lit (i.e., once the ball is rolling downhill), the process is self-sustaining.  So, the whole issue about making a fire really does come down to the start of the process.

How many different ways can you start a fire?  One way is to use another fire.  Think about the folks running around the countryside with the Olympic torch before the games.  They use that torch to light another torch to light another torch, and on and on, all of the way until they light the big torch in the stadium.  Another way to start a fire is to use heat.  That, effectively, is how I lit a cigar the other evening.  I used friction to generate heat to ignite a match.  Then, holding the match like an Olympic torch, I used that fire to light the fuel of the cigar tobacco.  This model of a cascading series of larger and larger fires is used over and over in different forms.  Thus, when we talk about starting a fire, we often have to discuss not only the small initial energy bump, but then also the chain of events leading to the complete, steady state process.

So, first we have the initiation, or as The Boss said, “the spark.”  Off the top of my head, I can think of four ways that we’ve practically implemented on rocket engine systems to provide that initial energy boost and one other way that, to date, remains somewhat experimental.  There may be others, but these are the ones that are most obvious and frequently used in different forms.

The first method is exactly what The Boss calls for, an electrical spark.  In most cases when lighting liquid propellants directly, the components on rocket engines used to make electrical sparks are not a whole lot different than higher-energy, more robust, and more reliable versions of the spark plugs that you’ve got in your automobile.  They use a high-voltage electrical circuit to make a spark jump across a gap thereby exposing whatever is around that gap, namely vaporized propellants, to ionizing electrical energy.

spark1

The second method also uses electrical energy but in this case rather than making a spark, you use it to make heat.  Think about an incandescent light bulb (i.e., the bulbs rapidly becoming old fashioned these days).  The intent of the wire filament is to produce light.  And it does.  But is also produces heat.  What if you apply that heat directly to a combustible mixture?  Depending upon the mixture, that’s all you need.  I’ll explain more below when we talk about the cascade.

These first two methods rely on electrical energy and that’s always convenient since wires are easy to run.  While it’s true that the ultimate power source can be heavy for the vehicle (batteries for example), the rest of the system is relatively light and easy.  The third method for providing that initial energy bump is not quite so clean.  Rather than relying on transferring electrical energy into a chemical reaction, it uses a transfer of energy from one chemical reaction to kick off another chemical reaction.  In the previous article we discussed hypergolic propellants.  These are propellants that combust spontaneously when they come into contact with each other.  They don’t need any energy boost to start reacting.  Well, what if you had a fluid that did that when it came into contact with your primary fuel or primary oxidizer?  You could squirt in some of this spontaneously combusting stuff, light off a small bit of your fuel or oxidizer, and then the energy for that small fire could light off the rest of the propellants.  This is a common means for starting kerosene (also called RP-1) engines.  The massive F-1 engine used as part of the Saturn V vehicle was lit by a hypergolic ignition system for the main combustion chamber.  The most common hypergols for this purpose are triethylborane (a.k.a., triethylboron), triethylaluminum, or some mixture of the two.
triet1

The fourth and last method that I can think of for supplying that initial energy bump again starts with electricity, but instead of generating a localized spark or heat, you transform the electrical energy into a laser.  I will not even begin to pretend that I know much about lasers other than the fact that they can provide a very focused, directed beam of energy, photon energy in this case, to exactly where you want to put it.  You can use that energy to make heat for ignition or – and now I’m way beyond my knowledge base – you can tune the wavelength to excite the propellant molecules directly.  I have a friend in Germany who has experimented with using lasers for rocket engine ignition.  Thus far, I know of no fielded rocket systems where this ignition method is used (although I’ve been told that the Russians have demonstrated it on a full-scale engine), but it offers some very interesting possibilities.

laser1

So, we’re done, right?  After all, you’ve got your spark (or some other energy boost) so you’re lit and ready to go.  Well, not always.  For the most convenient ignition source, specifically the electrically-flavored ones, our bump in energy, our spark or heat, is usually very localized.  Rocket propellants are usually highly energetic and that’s why they’re rocket propellants.  But that also means that you have to light the fire well.  I struggle with how to explain this in a positive sense, so I’ll explain it in the negative, i.e., tell you what you do not what to do.

In your combustion zone, you do not want to ignite just one small space, i.e., one corner, and let the fire spread unevenly.  A fire on one side of a combustion zone but not the other could allow unburned propellants to momentarily “pool” in the one region.  This could lead to detonation and/or conflagration pressure waves bouncing around your chamber until everything evens out.  That can be extremely dangerous to the point of tearing apart the engine.  Or maybe, because of these pooled, unburnt propellants, you get mixture ratios that cause hot streaks.  Most practical combustion chambers are not built to accommodate stoichiometric or oxidizer-rich combustion (unless it is specifically an ox-rich preburner where it is should be very ox-rich to avoid this same issue).  A localized phenomenon of a slight ox-rich ignition could burn a hole right through a combustion chamber wall.  Or, if you’re talking about a gas generator or a preburner, you could get hot streaks that damage turbine components.  I have seen the kind of damage that can be done in a turbine due to ox-rich hot streaks for just fractions of a second.

turbine1

Ideally, what you want is for your propellants to arrive and, blammo, everything it lit.  That “blammo” can be difficult to achieve with a localized energy into like a spark or a small electrical heat source, especially for larger engines.  To overcome this issue, we turn back to the simple analogy of the fireplace.  There, we go from the localized effect of the match, to perhaps a ball or two of crumpled newspaper, to shavings or kindling, to larger sticks, to eventually the logs.  So there is a cascade of events from small and localized to large and generalized.  I will give you two examples of how we apply this concept in rocket engines.

The J-2X gas generator has a pyrotechnic ignition system.  It’s quite easy to tell people that we ignite the GG with little, solid propellant charges.  Okay, but is that the whole story?  No, it’s not.  The solid propellant charge (think about little Estes® rocket motors) is just the fire-lighting-the-fire end of the process.

process1

It all starts with electrical current running through an igniter wire.  The electrical resistance of the igniter wire causes heat as the current passes through.  That heat is enough energy to push what’s called the “pryogen” into ignition.  You can think of the pryogen as being like the stuff on the head of a match.  Other flammable substances are often used but the idea is still the same.  That little fire in the initiator ignites the solid propellant and the solid propellant then shoots hot gases into the GG during the engine start sequence to ignite the hydrogen and oxygen just as they arrive.  Pyrotechnic igniters like this are highly reliable.  If that electrical current arrives, everything beyond that is pure chemical chain reaction that produces a powerful blast of ignition energy.  On the negative side, such an igniter can only be used once.  I guess that you could inspect and refurbish elements of the piece, but considering the trauma of the process it experiences, it is easier and cheaper to simply replace the whole thing.

Another example of the concept of using an ignition cascade can be found on the J-2X in the form of the torch igniter used for the main injector.  Here’s an interesting little piece of history (as it’s been told to me).  The J-2 engine, back in the 1960’s was a pioneering effort.  While the RL10 was already flying, the use of hydrogen as a propellant was still something relatively novel.  For the J-2 main injector they developed a torch igniter system.  That system was later adopted and modified slightly for use as the ignition system for the Space Shuttle Main Engine main injector and both preburner injectors.  When we came to the development of J-2X, we started with our many years of successful experience with the SSME torch ignition system, made some modifications and, through a dedicated test program at the igniter level, effectively revalidated and expanded upon the pioneering efforts of the 1960’s.  It’s good to be part of another small step in that long and successful history.

process2

The torch igniter concept starts with an electrical spark from what really looks like your ordinary automobile spark plug.  But such a spark is very small, very localized.  So what you do is swirl into that localized area just a little hydrogen and oxygen.  This is the kindling.  The electrical potential across the gap of the spark plug causes the gasified propellants to ionize and become very hot, hot enough to start to spread the fire and, from that, thereby creating a flame front.  That flame is then directed into the combustion zone just as the rest of the propellants are reaching the injector.  The whole igniter system is effectively a torch ejecting a flame into the combustion zone.  In the J-2X (and in the SSME and in the J-2), the torch is right in the center of the injector face.

ssme

Okay, so there you have it, in two articles, how to get a liquid rocket engine up and going.  First, you have to get the propellants moving to the right places and, second, once they’re there, you’ve got to light the fire.  For large rocket engines, the whole process from the receipt of the start command from the vehicle until the engine is functioning at full power level takes anywhere from about three to six seconds.  During that time, pumps have to start spinning, valves have to open, propellants have to reach their destinations in the correct proportions, and the ignition source has to try to light the fire not too early and not too late.  It really is quite an orchestration of events across a brief period of time.  And the more complex the engine, the more difficult it is to get the orchestration right.

Looking into the database for SSME history, the very first test was conducted on 10 May 1975 with development engine #1 on test stand A1.  It was not until the forty-second test of the test series, nearly ten months later, that they eclipsed five seconds of firing duration and reached true mainstage operation.  So, it was not easy making that orchestration work.  Over the years, I’ve had the opportunity to meet and work with a handful of the folks who were there figuring out how to make the SSME work.  They were all very impressive engineers and thank goodness since we are still benefitting from their efforts.  And with that final historical note, we end this article with some more words of wisdom from The Boss:

boss1

J-2X Progress: Shaking up the Night

The first rocket engine test that I ever saw in person at the NASA Stennis Space Center in southern Mississippi occurred well over twenty years ago.  I’d already been doing test data analysis and power balance analysis in support of the Space Shuttle Main Engine (SSME) Project for some months.  I had made several data review presentations in front of then chief engineer (and rocket engine legend) Otto Goetz.  I could quote engine facts, statistics, and tell you all about how the SSME worked.  I’d even seen some videos of engine tests.  But it was not until I saw a test in person that I achieved the state that can only be described as awestruck.

WVBIt was late in the evening and a little chilly.  Though we’d arrived at the control center before dusk, test preparations had dragged on so that now darkness had enveloped the center.  The test stand stood out against the blackened sky like a battleship docked in the distance.  Brian, my team lead at the time with whom I’d driven down from Huntsville, and I were standing outside in the control room in the parking lot.  The radiation from the hydrogen flair stack off to our left warmed one side of our face as the breeze cooled the opposite cheek.  The wailing of the final warning sirens drifted off and all that could be heard was the burning torch of the flair stack and, in the distance, the low surging and gushing of water being pumped into the flame bucket.  We were a just a couple of hundred yards from the stand.

Then, the engine started.

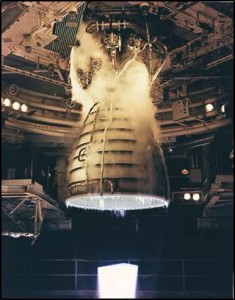
Picture1First, there is the flash and then, quickly, the wave of noise swallows you where you stand.  Unless you are there, you cannot appreciate the volume of the sound.  It is not mechanical exactly.  It is certainly not musical.  It is not a howl or a screech.  It is, rather, a rumble through your chest and a shattering roar and rattle through your head.  You think instinctively to yourself that something this primal, this terrible must be tearing the night asunder; it surely must be destructive, like a savage crack of thunder that continues on and on without yielding.  You are deafened to everything else, deprived of hearing because of all that you hear.  Yet before your eyes there is the small yet piercing brightness of the engine nozzle exit that can just be seen on what you know to be deck 5 of the stand and, to the right, there are flashes of orange flame stabbing into the billowing exhaust clouds mounting to ten stories high, tinged rusty in the fluctuating shadows.  It is like a bomb exploding continuously for eight minutes and yet the amazing thing, in incongruent fact so difficult to grasp as you are trying to absorb and appreciate the sensation is that the whole event is controlled and contained.  You cannot believe that so much raw power can be expressed by what is only a distant dot within your field of vision.

This is an experience that I wish everyone could have.  There are so many extraordinary feats of engineering all around us that we can appreciate and admire, but nothing for me has ever been as visceral as seeing an engine test, especially at night, with the nozzle open to the night air (and not buried in a diffuser).  No engine schematic or listing of characteristics or series of still pictures is an adequate substitute for the majesty of that controlled power.

Since that first test, I’ve seen any number of other engine tests including SSME (what we now call RS-25), a couple of other, smaller engines, and, of course, J-2X.  But it was not until the end of June of this year that I again had the opportunity to see a nighttime test on NASA SSC test stand A1.  This was J-2X E10002.  Below is the video, and it’s really cool, but I wish that you could have been there, standing beside me in the parking lot.  Listen carefully to the end of the recording and you’ll hear people cheering.  I was amongst the appreciative, awestruck chorus.


LEO Progress: J-2X to Test Stand A1

“Nothing behind me, everything ahead of me, as is ever so on the road.”
– Jack Kerouac, On the Road

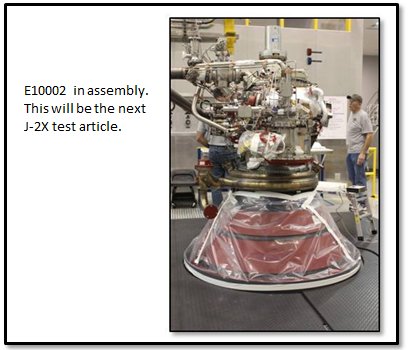
Recently, J-2X development engine 10002 was on the road.  If you remember, E10002 went through a six-test series on test stand A2 that began in February and finished up in April.  The next planned phase of E10002 testing is on test stand A1.  In between these series, the engine was back in the assembly area of NASA Stennis Space Center Building 9101.

1038170

This respite between test series allowed for a complete series of inspections of the engine hardware.  This is vital piece of the learning process for engine development.  The basic truth is that a rocket engine is just darn tough on itself when it fires.  The reason that we test and test and test is to make sure that our design can stand up to the recurring brutal conditions.  The chance to look for the effects of that testing through detailed inspections away from the test stand is an opportunity to collect a great deal of useful information.

Also, even before the engine arrived at the assembly area, the stub nozzle extension was removed.  This was done while the engine was still installed in the test stand.  Remember, the testing on test stand A2 was performed with a passive diffuser and so we were able to use an instrumented stub nozzle extension to examine the nozzle thermal environments.  On A1, there will be no diffuser.  We’ll be firing straight into the ambient Mississippi afternoon and so we’ll not have any nozzle extension attached.  The other change made to the engine — this one made while in the assembly area — was that we swapped out the flexible inlet ducts so that we can use our specially instrumented ducts for the gimbal testing on A1.  These ducts will provide a great deal of unique data when we gimbal the engine and force the inlet ducts to twist and bend and they are designed to do.

Below is my favorite picture from the recent assembly activities for E10002 back in Building 9101.

1038171

“FOE” stands for “foreign object elimination.”  I love this picture because it is a demonstration of how dedicated and meticulous are our assembly techs and how much basic integrity they bring to their job every single day.  In the rocket engine business we tend to be fanatics about foreign objects (i.e., random debris of unknown origin) hanging around.  The reason for this is that if you spend enough time in the business, you will eventually have a story of what happens when trash gets into the engine.  The rocket in question might be an amazingly powerful beast pumping out five hundred pounds of propellant per second generating 300,000 pounds of thrust, but all it takes is one bit of junk in the wrong place to destroy the whole thing in fractions of a second.

In the picture above is a small nut that was found in the periphery of the assembly area.  Shoot, if this was my garage you’d be lucky to find a clean patch not strewn with various bits of stuff like nuts, bolts, wads of duct tape, old hunks of sandpaper, that lost pair of pliers, a “Huey Lewis and the News” cassette, or, well, who knows what.  But the rocket engine assembly area is NOT my garage (thank goodness).  When something is found like a stray nut in the picture above, that sets off an investigation.  Where did it come from?  How did it get loose?  What procedure allowed this nut to escape control?  This is serious stuff.  Yet, just think about how easy it would have been for a tech to see that stray nut, pick it up, and stick it in his pocket.  They could have avoided the whole minor investigation thing entirely.  But that’s not what they did and that is not what they do.  Because they know that if they do not show the necessary integrity and methodical approach to continue to learn and perfect our procedures, then the next stray nut could be lodged where it could do terrible damage.

Here are the techs moving E10002 out of its assembly bay and unpacking it for transport.

1038172

And a couple more pictures of the process in Building 9101.

1038173

Here’s the engine ready for the road, then being lifted up the side of the test stand, and then sitting in the porch area while sitting on the engine vertical installer.  I really enjoy the pictures of the engine trucking about sunny NASA SSC.  That picture was the inspiration for including the Jack Kerouac quote at the beginning of the article.  It’s bright and shiny and full of so much thrill and promise.

1038174

All of this should look reasonably familiar.  It is the process that we follow, more or less, whenever we take an engine out to the stand.  Getting the engine into and out of A1 is a bit easier since you don’t have to deal with moving the diffuser out of the way, but they’re really quite similar.  The slightly different flavor that we’ve got for this testing is the addition of the thrust vector control system.  In the picture below you can see where these hang.  The engine mounts up with the gimbal bearing to the stout, yellow thrust take-out structure.

1038175

The two hydraulic actuators are also attached to the thrust take-out structure but slightly outboard and at 90 degrees apart.  These actuators are what will swing the engine around as if we were steering a vehicle.  Here, below, is another, closer view of the thrust take-out structure and the actuators.

1038176

In the picture below, E10002 is mounted up to the thrust take-out structure.  The gimbal bearing is the shiny object towards which the arrow is pointing.  If you look over to the right side of the picture, you can see one of the “scissors ducts,” i.e., the flexible propellant inlet ducts.

1038177

The next picture shows one of the hydraulic actuators hooked up to the engine.  As you can see the tolerances are awfully tight.  That’s an important vehicle integration consideration.  If this was a vehicle stage rather than a test stand to which we were attaching the engine, the thrust structure and the actuators would be the responsibility of the stage manufacturer.  Making sure that the stage and the engine can work together in such close quarters takes a great deal of vigilance between the two teams.

1038178

So, you’re probably asking yourself, to what do these actuators connect on the engine?  That’s a very good question.  It certainly isn’t obvious from the assembly pictures.  The actuators connect to the forward manifold of the main combustion chamber (MCC).  Below is a computer model of the MCC with the two actuator attachment points shown.

1038179

The MCC is really the heart of the whole engine, the sturdy framework stuck right in the middle, so it makes sense that when you want to push the engine around, this is what you’d have to push.  This final picture below of the engine completely mounted into the stand.  Again, it’s amazing to think about that whole thing being able to move about and not having one component run into another component or the actuators or the stand.  It is quite the integration miracle.

1038180

Testing for E10002 on test stand A1 will commence in June.  So, if all goes well, for the next J-2X update, I’ll be able to link in a video of the engine firing and twisting about.

BTW, NASA is in the process of swapping software used for posting blog articles and comments and such.  As part of this process, they have to shut down the capability to accept input comments for a short time, specifically the first two weeks of July 2013.  Sorry about that.  But after that, it ought to be up and running as normal.

LEO Progress: RS-25 Adaptation

I love dictionaries (yes, I know, you’re shocked; shocked!).  I have several at home and at work including a two-volume abridged Oxford English Dictionary (OED) that was a wonderful gift from my mother several years ago. 


The definitions and word origin above comes from the OED on-line site.  Embedded within our language is so much condensed history and accumulated knowledge that it’s amazing.  While I have no doubt that this is true of every language, I only know my own to any significant degree.  Indeed, I’ve been babbling my own language for a long time now — forty-some years — but I can always pick up a dictionary and learn something new with just the flick of a page or two.  You really can’t say that about too many other things.

As the title for the article and the definitions above suggest, for this article we’re going to talk about “adaptation,” specifically about adaptation of the RS-25 engine.  As part of the Space Launch System Program, we are undertaking something a bit unusual for the world of rocket engines.  We are taking engines designed for one vehicle and finding a way to use them on another vehicle.  Now, this is not a completely unique circumstance.  The Soviets/Russians really were/are masters of this kind of thing.  But for us, it is not something that we do very often.  In terms of the big NASA program rocket engines, I can only think of the RL10 that was originally part of the Saturn I vehicle as an engine design that has had a long second and even third career on other vehicle systems.  The truth is that engines and vehicles are, for us, generally a matched set and the reason is that we just don’t frequently enough build that many of either.  Note that, technically speaking, we are also adapting the J-2X from a previous program, Constellation/Ares, but that’s obviously a bit different in scope and scale given where we are in the development cycle.

The name “RS-25” is, as I’ve mentioned in past articles, the generic name for the engine that everyone has known for years as the “SSME,” i.e., the Space Shuttle Main Engine.  There is much to talk about the RS-25.  Lots and lots of stuff.  More stuff that I could possibly fit into a single article.  Here are just some of the RS-25 topics that we’ll have to defer to future articles:

       •  History and evolution
       •  A tour of the schematic
       •  Engine control, performance, and capabilities

For this article, I want to just talk about the scope of work that will be necessary to adapt RS-25 to suit the Space Launch System Program. 


Clear Communication
The most significant thing that has to be done to the RS-25 to make suitable for the new program is that it has to be able to respond to and talk to vehicle.  Remember, the Space Shuttle was developed in the 1970s and first flown in the 1980s.  Yes, many things were updated over the years, but given the lightning-fast speed of computer evolution and development, it is not surprising that what RS-25 is carrying around a controller basically can’t communicate with the system being developed today for the SLS vehicle.  The SLS vehicle would say, “Commence purge sequence three,” and the engine would respond, “Like, hey dude, no duh, take a chill pill” and then do nothing (my lame imitation of 1980s slang as best I remember it).


But here are the neato things that we’ll be able to do: We can use almost all of the work now completed on the J-2X engine controller hardware to inform the new RS-25 controller and we can use the exact same basic software algorithms from the SSME.  Because the RS-25 has a different control scheme from the J-2X, we cannot use the exact controller unit design from J-2X, but we can use a lot of what we’ve learned over the past few years.  And, because we can directly port over the basic control algorithms, we don’t have to re-validate these vital pieces from the ground up.  We just have to validate their operation within the new controller.  That’s a huge savings.

This is work that is happening right now, as I’m typing.  Pratt & Whitney Rocketdyne, the RS-25 developer and manufacturer, is working together with Honeywell International, the electronic controller developer, on this activity.  Within the next couple of months, they will have progressed beyond the point of the critical design review for both the hardware and software. 

In the long term, it is our hope that we will evolve to the utopian plain of having one universal engine controller, a “common engine controller,” that can be easily fitted to any engine, past, present, or future.  Such a vision has in mind a standardization of methods and architecture such that we could largely minimize controller development efforts in the future to the accommodation of obsolescence issues.  The simple truth is that development work is always expensive.  It would be nice to avoid as much as that cost as possible.  With the new RS-25 controller, we’re getting pretty close to that kind of situation.

Under Pressure
Have you ever spent much time thinking about water towers?  As in, for instance, why are they towers in the first place?  As you might have guessed, this is something that I wondered about many years ago as a pre-engineering spud.  They seemed to be an awfully silly thing to build when you could just turn on the faucet and have water spurt out whenever you want.  Ah, the wonderful simplicity of childhood logic:  Things work just because they do and every day is Saturday.

The reason that you go to the trouble of sticking water way up in a tower is so that you have a reliable source of water pressure that can absorb the varying demands on the overall system.  In the background, you can have a little pump going “chug, chug, chug” twenty-four hours per day pushing water all of the way up there, but by having this large, reserve quantity always in the tower, the system can respond with sufficient pressure when, at six in the morning, everyone in town happens to turn on the shower at the same time to start their day.  The pressure comes from the elevation of tower, the height of the column of water from top to bottom.

On the Space Launch System vehicle we have something of a water tower situation except that, in this case, we’re dealing with liquid oxygen.  In the picture below, you can see roughly scaled images of the Space Shuttle and the Block 2 Space Launch System vehicle.  On both of these vehicles, the liquid oxygen tank is above the liquid hydrogen tank.  This means that for the very tall SLS vehicle, the top of oxygen tank is approximately fifty feet higher relative to the inlet to the engines (as illustrated).  This additional fifty feet of elevation translates to more pressure at the bottom just as if it were a taller water tower.  However, in this case liquid oxygen is heavier than water (meaning more pressure) and the SLS vehicle will be flying, sometimes, at accelerations much higher than a water tower sitting still in the Earth’s gravitational field.  Greater acceleration also amplifies the pressure seen by the engines at the bottom of the rocket.


“So what?” you’re saying to yourself as you read this.  After all, higher pressure is a good thing, right?  If you have more pressure at the inlet to the engine, then you don’t need as much pumping power.  So, life should be easier for the engines with this longer, taller configuration.  There are two reasons why this is not quite the case.

First, think about when the vehicle is sitting on the pad at the point of engine start.  The pumps aren’t spinning so all the pressure you’re dealing with is coming from the propellant feed system.  And now, simply, for the SLS vehicle it will be different than before.  One of the tricky things about a staged-combustion engine, in general, is that the start sequence (i.e., the sequence of opening valves, igniting combustion, getting turbopumps spun up) is touchy.  Given that the RS-25 has two separate pre-burners — and therefore three separate combustion zones — and four separate turbopumps, the RS-25 start sequence especially touchy.  You have to maintain a very careful balance of combustion mixture ratios that allow things to light robustly, but not too hot, and a careful balance of pressures throughout the system so as to keep the flow headed in the right direction and keep the slow build to full power level as smooth as possible.  We have an RS-25 start sequence that works for Space Shuttle.  Now, for the SLS vehicle, we will have to modify it to adapt to these new conditions.

The second issue to overcome with regards to the longer vehicle configuration and the liquid oxygen inlet conditions is due total range of pressures that the engines have to accommodate.  When sitting on the launch pad, you have the pressure generated by the acceleration of gravity.  During flight, as you’re burning up and expelling propellants, the vehicle is getting lighter and lighter and you’re accelerating faster and faster, you can reach the equivalent of three or four times the acceleration of gravity.  So that’s the top end pressure. 

On the low end, you have the effect of when the boosters burn out and are ejected at approximately two minutes into flight.  When this happens, the acceleration of the vehicle usually becomes less than the acceleration of gravity meaning that the propellant pressure at the bottom of the column of liquid oxygen can get pretty low.  Momentarily, the vehicle seems to hang, almost seemingly falling, despite the fact that the RS-25 engines continue to fire.  Pretty quickly, however, the process of picking up acceleration begins again.  (In the movie Apollo 13, they illustrated a similar effect with the separation of the first and second stages of Saturn V.  The astronauts are pushed back in their seats by the acceleration until, boom, first stage shutdown and separation happens and they’re effectively thrown forward.  With the Space Shuttle and the SLS vehicle, however, the return to acceleration is not as abrupt as it was on Saturn V where they show the astronauts slammed back into their seats with the lighting of the second stage.)  The point is that the RS-25 has to accommodate a very wide range of inlet pressures while maintaining a set thrust level and engine mixture ratio.  While this has always been the case for the SSME/RS-25, the longer SLS vehicle configuration simply exacerbates the situation.

You’ll note that I’ve not talked about the liquid hydrogen here.  That’s because, as I’ve mentioned in the past, liquid hydrogen is very, very light.  Think of fat-free, artificial whipped cream.  Yes, the top of the hydrogen tank is much higher, but due to the lightness of the liquid, it doesn’t make much difference at the engine inlet even when the vehicle is accelerating at several times the acceleration of gravity.

Some Like it…Insulated
Look again at the pictorial comparison of the Space Shuttle and the Space Launch System vehicles shown above.  Do you see where the SSME/RS-25 engines are relative to the big boosters on the sides of the vehicles?  On the Space Shuttle, the engines were on the Orbiter and they were forward of the booster nozzles.  On the SLS vehicle, there is no Orbiter so the engines are right on the bottom of the tanks and their exit planes line up with the booster nozzle exit planes.  In short, the engines are now closer to those great big, loud, powerful, and HOT boosters.  We are in the process now of determining whether this poses any thermal environments issues for the RS-25.  Thus far, based upon analyses to date, there do not appear to be any thermal issues that cannot be obviated through the judicious use of insulation.

Other environments also have to be checked such as the dynamic loads transmitted to the engine through the vehicle or the acoustic loads or whatever else is different for this vehicle.  The point is not that all of these environments are necessarily worse than what they were on the Space Shuttle.  It is only that they all need to be checked to make sure that our previous certification of the engine is still valid for all of these considerations.

The Tropic of Exploration
So those are the three most obvious and primary pieces of the RS-25 adaptation puzzle: a new engine controller, dealing with different propellant inlet conditions, and understanding the new vehicle and mission environments.  Each of these pieces carries with it analysis and testing and the appropriate documentation so there is plenty of work scope to accomplish.  We are extremely lucky to be starting with an engine of such extraordinary pedigree, performance, and flexibility. 

Henry Miller once said, “Whatever there be of progress in life comes not through adaptation but through daring.”  It is our intent to prove Mr. Miller wrong in this case.  We will make progress by using the adaptation of RS-25 to enable the daring of our exploration mission.

Liquid Engines Extra — Introducing LEO

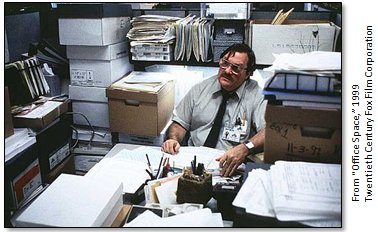
The following picture is a test.  Find me amidst the mess…

That’s right.  I’m the handsome chap with the snazzy specs.  See, I’m just oozing with exactly the vitality that you’d expect from your typical government-trained civil servant!  Well, okay, so maybe I’m not exactly Milton Waddams.  All personal resemblance and charm aside, I don’t actually have quite that much paper clutter in my office.  No.  Instead, I just have electronic clutter.  Indeed, if someone spent the time to actually print out all the stuff on my computer here at work, then we wouldn’t need a rocket to get beyond the moon.  We could just build a staircase from the resulting gargantuan pile of paper. 

Why is this the case?  It could be that I’m just a data hoarder.  Some people hoard clothes (that’s not me).  Some people hoard automobiles (that’s not me).  Some people hoard books (okay, that is me).  And some people hoard data.  All data.  All of the way back to class notes from Aerodynamics I (AERSP 311, junior year, professor Bill Holl — great teacher, great guy).  Yes, okay, so maybe I’m a little guilty of all that.  In my defense, however, I will simply say that there’s a lot that goes into making rocket engines and much of it is quite removed from the exciting cutting-metal stuff or the making-smoke-and-fire stuff.  And I get to stick my nose into much of it.  For this article, I am going to reveal super-duper, deep-and-dark secrets that they won’t even teach you in college.  I am going to tell you a little about …

…wait for it…

…project management.  Yes, it’s true:  I am going to invite you into our little piece of office space and I will do so to tell you about how the office has recently evolved.  Also, towards the end as a reward, I’ll give you an update of J-2X testing progress to date.

So, let me introduce you to LEO —


No, none of those LEOs.  Instead, let me introduce you to the Space Launch System (SLS) Program Liquid Engines Office (LEO).  The LEO is responsible for development and delivery of the liquid rocket engines for the core stage and upper stage of the SLS vehicle.  For more information about the SLS Program in general, I highly recommend the following site: https://www.nasa.gov/exploration/systems/sls/

(Oh, and I want to say something briefly about the term “liquid engines.”  Probably every single person who would bother to read a blog about engines or rockets or space travel in general knows that this is just a shorthand term.  No, we are not talking about engines made of liquid — although that would be really cool.  “Liquid engines” is a quick and easy way to denote “liquid-propellant rocket engines.”  In case I’ve disappointed anyone, I’m sorry.  If ever we are able to make an engine out of liquid, I promise to be the first to report it.  Probably the most far-out thing that I once heard was the suggestion to make a hybrid rocket motor using solid hydrogen and liquid oxygen.  I cannot even imagine what the infrastructure would be to make the use of solid hydrogen plausible, but you never know…)

For the SLS vehicle, the upper-stage engine is the rocket engine so near and dear to our hearts after several years of design and development and fabrication and assembly and test:  J-2X.  The core-stage engine is the RS-25.  No, the RS-25 is not a brand new engine.  Rather, it is the generic name for that workhorse of the last thirty years, the Space Shuttle Main Engine (SSME). 
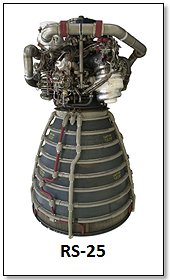
At the end of the Space Shuttle Program, there were fourteen SSMEs that had flown in space on the Shuttle and that still had usable life remaining.  I’m not sure that everyone knows this, but rocket engines have limited useful lives.  I guess that most things do, but with rocket engines it’s often pretty short.  Think of them like cherry blossoms (popular motif in Japanese tattoos): amazingly beautiful and quickly gone too soon.  The stresses within an operating rocket engine are tremendous.  For example, the J-2X has an official, useful life of only four starts and less than 2,000 seconds of operational run time after the engine has been delivered for use as part of the vehicle.  No, the engine doesn’t crumble into dust after that, but based upon our certification strategy and on our analysis of margins, that is the official life for our human-rated launch system.  After that point, depending on the proposed usage and risk considerations, and based on the likely reassessment of our margins with the proverbial “sharper pencil,” we can and do routinely talk ourselves into longer active lives for engine hardware.  On the test stand, we can test the J-2X upwards of 30 times and for lots of run time, but that is a lower risk situation.  Nobody is riding the test stand into space. 

Thus, when you come to the end of a program and you have fourteen engines with remaining, usable life, then you’ve got one heck of a residual resource.  In addition, there was one SSME assembled and ready to go, but it never made it to the test stand or the vehicle.  So it’s brand new.  And, on top of that, there were enough leftover pieces and parts lying around of flight-quality hardware to cobble together yet another engine.  And, there’s more! (Yes, I feel like the late-night infomercial guy, “and if you call in the next 10 minutes you will get this special gift!”)  There are also two development SSMEs.  These are not new enough to fly, but they are useful for ground testing and issues resolution.  That means that there are a total of sixteen RS-25 flight engines and two RS-25 development engines available to support the SLS Program. 

However, before your excitement bubbles over, you have to understand that when you see a sign for “free puppies,” you probably shouldn’t take that whole notion of “free” too literally.  As in, well, not at all.  Yes, we still have an extraordinary asset in the residual RS-25 engines.  No question.  But, we have work to do to integrate them into the SLS Program.  In a future article, I will discuss the multiple facets of this work.  By the way, I cannot claim to be immune from the “free puppies” thing myself.  Meet Ruugie –
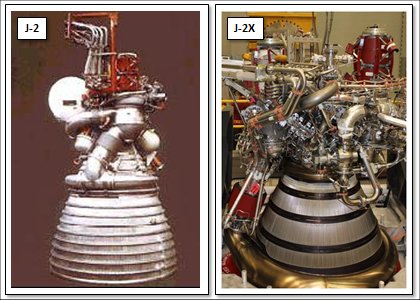
The Liquid Engines Office (LEO) was formed to manage both the J-2X and the RS-25.  This office will also manage other liquid rocket engines used to support the SLS Program as it matures.  It was decided from a project management perspective that it would be best to have one office manage both engines.  In this way, we can be more efficient by leveraging the expertise across various disciplines and components.  For example, do we really need two turbomachinery subsystem managers?  No, Gary Genge is our turbomachinery subsystem manager and in that position he can understand and evaluate the relative programmatic and technical risk across all of the various turbomachinery pieces under his purview.  If in some utopian future our office responsibilities expands to three or four or eight different engine development or production efforts, we would, in theory, maintain the same structure but provide Gary with the support necessary to effectively manage turbomachinery across so many activities. 

So, for LEO we have subsystem managers for Engine Systems (effectively systems engineering and integration), Engine Assembly and Test (also includes asset management, logistics, and operations), Engine System Integration and Hardware, Valves and Actuators, Engine Control Avionics, Turbomachinery, and Combustion Devices.  LEO is supported by a Chief Engineer, a Chief Safety and Mission Assurance (S&MA) Officer, Program Planning and Control (i.e., the business office), and Procurement.  Plus, of course, we have support from the engineering and S&MA organizations across the many technical disciplines.  The structure is really quite similar to how we’ve been managing J-2X for these past several years.  We’ve just expanded our responsibilities.

So, that’s LEO and I’ll be talking more about RS-25 and SLS in the future.

Now, while I’ve been off doing my little part to get the foundation of LEO solid, including refreshing and getting into place our prime contracts for both J-2X and RS-25, how has J-2X been doing?  Well, in short, J-2X has been just cruising along.  E10002 has gone through six tests on NASA Stennis Space Center (SSC) test stand A-2.  Below are a series of images showing what an E10002 start looks like if you stood in view of the flame bucket (which I would very strongly advise against, by the way):

First, all you see is the facility water being pumped into the flame bucket.  Then you can see the ignition and everything glows orange.  Then the whole flame bucket is filled with exhaust.  And, finally, the exhaust coming barrelling down the spillway and eventually engulfs the camera.  The final step is not shown since there’s nothing to see but solid whitish grayness.

Here are the stats on the six tests:
     • Test:          A2J022          2/15/2013          35 seconds duration
     • Test:          A2J023          2/27/2013          550 seconds duration
     • Test:          A2J024          3/07/2013          560 seconds duration
     • Test:          A2J025          3/19/2013          425 seconds duration
     • Test:          A2J026          4/04/2013          570 seconds duration
     • Test:          A2J027          4/17/2013          16 seconds duration

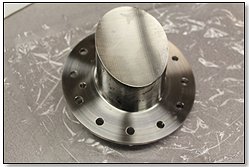
So the total accumulated time is 2,156 seconds.  Tests #22, #25, and #27 all experienced early cuts, but all three were instigated by different flavors of instrumentation or monitoring system issues or oddities.  The engine is fine and running well.  Some of the key objectives included gathering additional data about the nozzle extension cooling characteristics, additional samples of the turbomachinery design, and main chamber combustion stability trials.  Something else that we did for this test series is that we tested a very special fuel turbopump port cover.  Here’s a picture of it:

Now, port covers are not something about which one usually says anything at all.  What makes this one special is that it was made by using a process known as Selective Laser Melting (SLM).  That is a fabrication method that is somewhat analogous to “3-D printing.”  A long time ago, I wrote a blog article about a gas generator discharge duct that we made for component-level testing using this technique.  This, however, is an engine test and this small, seemingly innocuous, piece of engine hardware may be the humble harbinger of a revolution in rocket engine fabrication.  The fact that we systematically stepped through the process of validating this port cover as a piece of hardware for an engine hot fire demonstration paves the way for pursuing other parts in the future, more complex parts, and, hopefully one day, regular production parts as part of a human-rated launch architecture. 

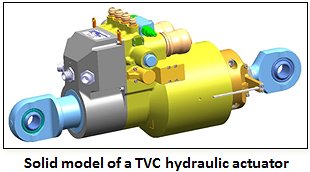
E10002 was removed from NASA SSC test stand A-2 on April 30th.  It is currently being retrofitted with instrumented inlet ducts and other hardware in preparation for the next phase of testing that will occur on NASA SSC test stand A-1.  As you’ll remember, in the past A-1 was used for the PowerPack Assembly testing.  Well, the talented and productive folks at NASA SSC remodeled the stand back to the configuration for engine testing.  The current plan is to install E10002 into A-1 by mid-May and to perform a series of five to seven tests through probably August.  The reason for using A-1 for the next series is because that stand does not have a diffuser.  That means that we can gimbal the engine, i.e., twist it around as if we were providing steering for a vehicle.  The thrust vector control (TVC) system composed of the hydraulic push-pull actuators that will be performing the gimballing is a component belonging to the stages element of the vehicle.  This testing will be providing those folks with data to inform their system design for the SLS Program.  See, it’s all win-win when we play nicely together.

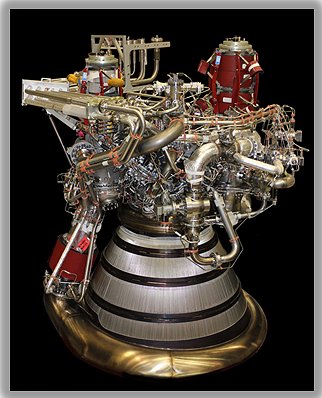
And, finally, right on the heels of E10002, the assembly of E10003 will commence in June with scheduled installation into NASA SSC A-2 in September.  That’s my report for where things stand.  To finish up, I’ll leave you with a purely gratuitous glamor shot of the J-2X.  Isn’t she pretty?


J-2X Progress: Current Status, The End of 2012

Once upon a time, not that long ago, people used to communicate by what were known as “letters.”  These were written documents.  Yes, actual hardcopy, paper items. And they were often transcribed by hand or, sometimes, generated on what was known as a “typewriter,” which was basically a manual, analog printer with no I/O port beyond direct keypad entry.  These “letters” were sent to their intended recipients using a small denomination currency with an adhesive backing that is recognized for exchange by only one quasi-governmental agency. 


I know that some of you may have doubts that people communicated with each other in primitive ways prior to email and text messages, but witness the cultural clues from the 1961 song illustrated above. 

It was always believed that the toughest letter to receive was the dreaded “Dear John” letter (as in, “Dear John, I’ve fallen in love with someone else…”).   However, I think t’at the hardest letter to write is the “it’s been awhile” letter.  This one starts, “Well, it’s been awhile since I’ve written.  Sorry.”  This blog article is just like one of those letters.  It’s been awhile since I’ve written one of these articles and I’m sorry about that.  I could give you a big long list of all the really, really serious stuff that I’ve been doing instead, but that’s just a bunch of feeble excuses so I’ll keep them to myself.  Instead, I’ll just get down to business and give you a status report on the J-2X development effort.

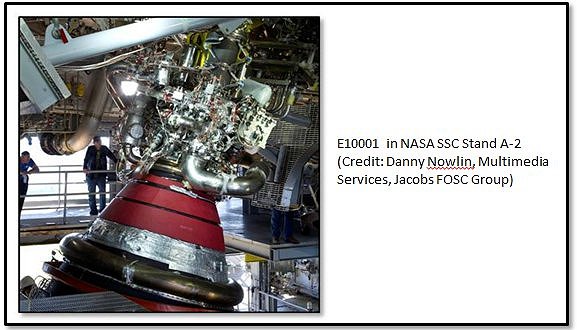
Engine #1 (E10001) Testing is Complete!
Over fourteen months and across the span of twenty-one tests, more than 2,700 seconds of engine run time was accumulated and recorded, including nearly 1,700 seconds of hot fire with an instrumented nozzle extension.  With this engine we achieved stable 100% power level operation by the fourth test and full mission duration by the eighth test.  While we don’t have any official statistics on the issue, most folks around here believe that we accomplished those milestones faster than has ever been done on a newly developed engine.  We learned how to calibrate the engine and the sensitivities that the engine has to different calibration settings, i.e., orifice sizes and valve positions.  We were able to estimate performance parameters for the full-configuration of the engine at vacuum conditions and the calculations suggest strongly that all requirements are met by this design and met with substantial margin.  This is significant considering that we’ve long considered our performance goals to be pretty aggressive.  Well, our little-engine-that-could showed us that it did just fine with those goals, thank you very much.

One of the truly unique and successful aspects of the E10001 testing was the testing of a nozzle extension.  This component is a key feature that allows J-2X performance to far exceed that of the J-2 engine from the Apollo Program era.  While it is true that we cannot test the full-length nozzle extension without a test stand that actively simulates altitude conditions, we did test a highly instrumented “stub” version that allowed us to characterize the thermal environments to which the nozzle is exposed during engine hot fire and it demonstrated the effectiveness and durability of the emissivity coating that was used.  This stub-nozzle configuration is actually the current baseline for the in-development Space Launch System vehicle upper stage.

Another key success for E10001 was the demonstration of both primary and secondary power levels with starts and shutdowns from each power level and with smooth in-run transitions back and forth between them.  That smoothness was thanks, in part, to demonstrating our understanding of the control of the engine.  From the very first test it was clear that we understood pretty well how to control the engine in terms of proper control orifices for the various operating conditions.  What we did not entirely understand — in other words the fine-tuning details — we successfully learned via trial-and-error throughout the E10001 test series.  All of this learning has been fed back into further anchoring our analytical tools and models so that we can move forward with J-2X development with a great deal of confidence.

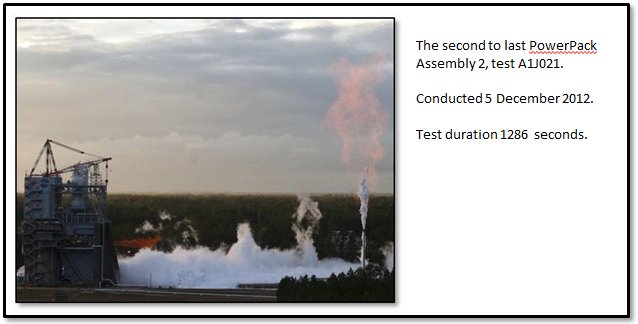
Okay, so that’s a brief description of just some of the good stuff.  We had lots and lots of good stuff with the E10001 testing, far more than just that I’ve discussed here (see previous blog articles).  The somewhat unfortunate part was the way in which the E10001 test series came to an end.  On test A2J021, we had a disconnection between the intent for test and the detailed planning that led to the actual hardware configuration we ran for the test.  That disconnection led to an ill-fated situation.  Let me explain…

The J-2X gas generator has ports into which solid propellant igniters are installed.  These igniters are like really high-powered Estes® rocket motors that light off when supplied with a high-energy electrical pulse.  The flame from the igniter lights the fire of the hydrogen-oxygen mixture during the engine start sequence.  It’s essentially the kindling for the fire of mainstage operation.  The igniters perform this function at a very specific time during this sequence.  If you try to light the fire too early, then you may not have enough propellant available in a combustible mixture so you get a sputtering fire.  If you try to light too late, then you may have too much propellant built up such that rather than getting a good fire, you get an explosion instead.  But here’s a key fact: You have to plug them in or they don’t work.

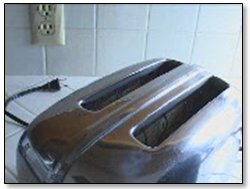
Have you ever stuck bread in the toaster, pushed down the plunger, gone off to make the coffee, and come back only to find that your darn toaster is broken?  You curse a little because you’re already late for work and this is the last darn thing you need.  You would think that somebody somewhere could make a toaster that lasts more than six months or a year or whatever.  For goodness sake!  We put a man on the moon and yet we can’t … oh, wait … um … ooops, it’s not plugged in.  My bad.

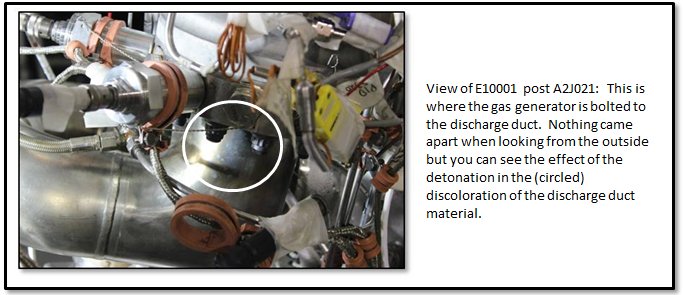
In a nutshell, that’s what happened on test A2J021.  The electronic ignition system sent the necessary pulse, but because of the uniqueness of our testing configuration as opposed to our flight configuration the wires carrying the pulse weren’t hooked up to the little solid propellant igniters in the gas generator.  In the picture below you can see the external indication that something was not entirely good immediately after the test.  The internal damage was more extensive to both the gas generator and the fuel turbopump turbine.

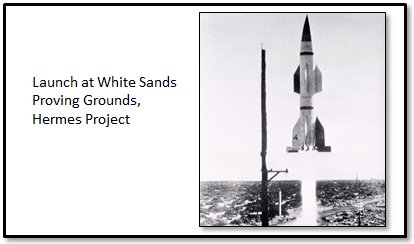
Many years ago, I met an elderly engineer who was still on the job well into his 80’s because he loved his work.  His entire career had been dedicated to testing.  He’d actually been there, out in the desert, in the 1940’s testing our very earliest rockets as part of the Hermes Project.  One day, they had a mini disaster on the launch pad.  He told me that the rocket basically just blew up where it sat.  Boom and then a mess.  And, it was his job to assemble the test report.  Being a conscientious, ambitious, young engineer, he recorded the facts and offered a narrative abstract and extensive, annotated introduction that categorized the test as, well, a failure.  Not long after submitting his report, one of the senior German engineers in the camp came into his office, put the test report down on the desk, and said that the tone of the report was entirely wrong.  He said, “Every test report should begin with: ‘This test was a success because…'”  The purpose of testing is to gather data and learn.  If you learn something, then your test was, by definition, a success on some level.  I’ve tried very hard to remember this very important bit of wisdom.

So, A2J021 was a success because we learned that we had some deficiencies in our pre-test checkout procedures.  It was a success because it was an extraordinary stress test on the gas generator system.  No, it didn’t recover and function properly, but neither did the engine come apart.  While that might seem like a minor detail, when you’re hundred miles from the surface of the earth, you would much rather have a situation where an abort is possible than a failure that could result in collateral vehicle damage and make safe abort impossible.  We have a stout design.  Good.  Also, this test failure was due to a unique ground test configuration.  In flight, it’s not really plausible just because we would never fly in this configuration.

So, E10001 completed its test program with a bang.  Kinda, sorta literally.  But it was nearly the end of its design life anyway, so we didn’t lose too many test opportunities, and, as I said, even with test A2J021 the way it happened we learned a great deal.  Overall, the E10001 test series was an outrageous success.  Rocketdyne, the J-2X contractor, ought to be darn proud and so should the outstanding assembly and test crews at the NASA Stennis Space Center and our data analysts here at the NASA Marshall Space Flight Center.  Bravo guys!  Go J-2X!

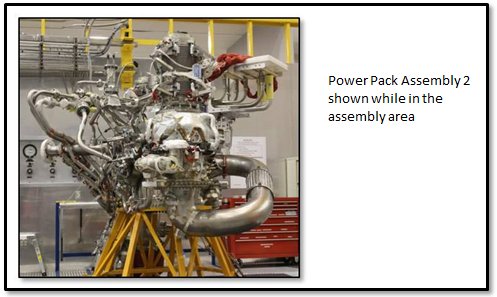
Power-Pack Assembly 2 (PPA-2) Testing is Complete!
Over ten months and across the span of thirteen tests, nearly 6,200 seconds of engine run time was accumulated and recorded on the J-2X Power Pack Assembly 2.  That’s over 100 minutes of hot fire.  Three of the tests were over 20 minutes long (plus one that clocked in at 19 minutes) and these represent the longest tests ever conducted at the NASA Stennis Space Center A-complex.  But more than just length, it was the extraordinary complexity of the test profiles that truly sets the PPA-2 testing apart.

Because PPA-2 was not a full engine with the constraints imposed by the need to feed a stable main combustion chamber, and because we used electro-mechanical actuators on the engine-side valves and hydraulic actuators on the facility side valves, we could push the PPA-2 turbomachinery across broad ranges of operating conditions.  These ranges represented extremes in boundary conditions and extremes in engine conditions and performance.  On several occasions we intentionally searched out conditions that would result in a test cut just so that we could better understand our margins.  As the saying goes: It’s only when you go too far do you truly learn just how far you can go.  We successfully (and safely) applied that adage several times.  In short, we gathered enough information to keep the turbomachinery and rotordynamics folks blissfully buried in data for months and months to come. 

On an interesting and instructive side note, the PPA-2 testing also showed us that we needed to redesign a seal internal to the hydrogen turbopump.  In the oxygen turbopump, you have an actively purged seal between the turbine side and the pump side.  After all, during operation you have hydrogen-rich hot gas pushing through the turbine side and liquid oxygen going through the pump side.  You obviously don’t want them to mix or the result could be catastrophic.  That’s why we have a purged seal.  But for the hydrogen turbopump you don’t have such an issue.  During operation, at worst should the two sides mix you could get some leakage of hydrogen from the pump side into the turbine side that is already hydrogen rich.  In order to maintain machine efficiency, you don’t want too much leakage, but a little is not catastrophic (and can be used constructively to cool the bearings).  What could be dangerous at the vehicle level, however, is if you have too much hydrogen floating around prior to liftoff.  This is especially true for an upper-stage engine like J-2X that’s typically sitting within an enclosed space until stage separation during the mission.  You could have the engine sitting on the pad for hours chilling down and filling the cryogenic systems and you don’t want gobs and gobs of hydrogen leaking through the turbopump since any leakage ends up within the closed vehicle compartment housing the engine.  That’s just asking for an explosion and a bad day.

To avoid this, within the J-2X hydrogen turbopump we have what is called a lift-off seal.  And, as the name applies, it’s a seal that actively lifts off when we’re ready to run the engine.  When the engine is just sitting there chilling down, not running, with liquid hydrogen filling the pump end of the hydrogen turbopump, the seal is, well, sealed.  Then, when we’re ready to go, it unseals and allows the turbopump to operate nominally.

During the PPA-2 test series we found that we formed a small material failure within the actuation pieces for our lift-off seal.  Then, upon analysis of the test data and a reassessment of the design, we figured out what was most likely the cause and Rocketdyne proposed a redesign to mitigate the issue.  Again, going back to that important piece of wisdom: This testing was a success because, in part, we learned that we needed a slight redesign of the lift-off seal.  That’s the whole purpose of development testing!  Everything always looks great when it’s just in blueprints.  It’s not until you hit the test stand do you truly learn what’s good and what need to be reconsidered.  In the end, this sort of rigor and perseverance is what gives you a final product that you feel good about putting in a vehicle carrying humans in space.  And that, truly, is what it’s all about.

As with E10001, the PPA-2 test series was simply an outrageous success.  Rocketdyne should be proud and so should the outstanding assembly and test crews at the NASA Stennis Space Center and the data analysts at the NASA Marshall Space Flight Center.  Bravo guys!  Go J-2X!

Engine #2 (E10002) Assembly is Underway
Our next star on the horizon is J-2X development Engine 10002.  It is being assembled right now, as I’m typing this article.  It is slated for assembly completion in January 2013 and it will be making lots of noise and very hot steam in the test stand soon after that.  While our current plans are to first test E10002 in test stand A2, we will later be moving it to test stand A1.  This, then, will be the first engine then to see both test stands.  The more important reason for the A1 testing, however, is because that will give us the opportunity to hook up some big hydraulic actuators and gimbal the engine, i.e., make it rock and tilt as though it were being used to steer a vehicle.  Now that will be some exciting video to post to the blog!  I can’t wait.

 
Happy New Year!
So, this has been my “it’s been awhile” letter.  Hopefully this will bring everyone up to speed with where we stand with J-2X development.  In my next article, I will share with you some of what’s been keeping me from my J-2X article writing over the last several months.  And, hopefully, it won’t be several months in the making.  So, farewell for now and Happy New Year!  On to 2013 and another great year full of J-2X successes.  Go J-2X!

Inside The J-2X Doghouse: Performance Measurement, Part 2 of 2

In the last article, we talked about the measurement of propellant flow during a test.  Propellant is the stuff we put into the rocket engine.  What we get out of the rocket engine is thrust.  We get propulsion.  Or, in the immortal words of Salt-n-Pepa, 1987, we get push… “Push it real good.”

But how do you measure “push,” or in other words, force?  The simple answer can be found through one of the most frightening household appliances any of us own:  The dreaded bathroom scale…

A bathroom scale works by pushing back at your weight when you stand on it.  Your weight is a force caused by your body mass and the Earth’s characteristic acceleration of gravity.  The scale pushes back with a spring system but deflects slightly under the load.  The scale is then measuring the deflection allowed by the springs at the equilibrium where the spring force exactly counteracts your weight.  More weight pushing down results in more deflection to the equilibrium point and that thereby results in a bigger reading (i.e., think: the Monday after Thanksgiving).

The way that we measure rocket engine thrust is basically the same thing except that instead of measuring something between zero and — as in the bathroom scale picture above — 300 pounds, we’re measuring hundreds of thousands of pounds of force.  Or, in the case of very large engines like the F-1 or the RD-170, we’re measuring over a million pounds of thrust.  That requires a system just a bit more rugged even if the principles remain the same.  What we use rather than bathroom scale and springs are things called “load cells.”  Below is an example of a generic load cell design:

The gray object with the funky cut through it is a metal piece.  As you can imagine, when forces are applied as shown, that slot on the right-hand side will tend to close slightly.  In turn, that would cause the metal on the left-hand side to stretch slightly as the whole thing bends a very little amount.  We measure that slight stretching of the metal on the left-hand side with a strain gauge bonded to the surface of the metal.  A strain gauge is a small electrical device that changes resistance when stretched.  Using an electrical circuit known as a Wheatstone Bridge, we measure small changes in electrical resistance caused by the slight deformations of the load cell.  The amount of stretch can be astonishingly small and yet good strain gauges and good electrical interpretation of the output can yield very accurate data.  The load cell is then calibrated using a known applied load and measuring the resulting strain (i.e., metal stretch).  You now have a more rugged version of a bathroom scale.  Apply a load, get a reading, and, ta-da, you’ve measured push.

Actual load cells used for rocket engines can take different forms from the generic cell shown here.  Any way that you can get an applied load to result in a slight, measureable stretching of metal (while obviously avoiding yielding or buckling) is a valid load cell design.

Above is a picture of a vertical load cell arrangement on test stand A-2 at the NASA Stennis Space Center, where we’ve been testing J-2X development engine E10001.  There are two pieces in series.  The bottom piece, the big chunk of metal with a bunch of crazy holes and slashing cuts through it, is called a “flexure,” which, to me, seems to be a silly name since it doesn’t look very flexible at all.  What it does, however, is effectively make sure that the load entering the load cell is properly directed through the intended vector.  Any skewing of the input off from the intended axis and your results could be erroneous.  The brown cylindrical thing above the flexure is the actual load cell.  You can see the strain gauge wires coming out of it that are fed into the data acquisition system.  This two-piece combination is effectively analogous to a spring in your bathroom scale.

The next item to discuss is how you put load cells into the structure of the test stand so that they can do their job.  On a bathroom scale, the thing that you step onto is essentially a platform “floating” above the base.  It has to be free to move so that the springs can compress honestly.  If there was some interference with this movement, then the reading would be wrong.  The same is true on the test stand when measuring engine thrust.  It is necessary to use a free-floating platform.  The picture below is a drawing of the platform used on test stand A-2.

The engine has a single input point as shown — the gimbal bearing that we’ve discussed before in previous articles — and there are three load cells above the platform.  This is not the only possible way to do it.  Other test stands use a rectangular pattern of four cells.  Or, if it’s a smaller system, you might be able to use just a single load cell.  The important point is that the load cells are in between the pushing engine and the resisting test stand.  Put into the structure of the test stand, and viewed from the side as in the picture below, you can see the whole stack up.  On the bottom is where you attach the engine.  In the middle is the platform into which the engine pushes.  And then the platform is connected to the structure of the stand through the load cells.  The structure of the stand has to be strong enough to absorb the thrust of the engine without distorting.  It has to be fixed (the mythical “immovable object” from physics class).  So, as you can imagine, when you’re talking about hundreds of thousands or even millions of pounds of force, the test stand structure is pretty darn stout.  We usually refer to the primary structure responsible for resisting the force of the engine as the “thrust take-out” structure. 

A final subject to mention is that matter of tares.  Tares are corrections to measured data.  For example, when you step on the bathroom scale and you’re dressed, do you subtract off an estimate for the weight of your clothing and your shoes?  If so, then you’re making a correction for a particular tare.  Of course, you have to do this accurately (honestly).  If I assume that my clothes and shoes are made of lead, for instance, then I can declare that I weigh the same as when Salt-n-Pepa were releasing their first albums.  But that’s not quite the truth.  Getting your tares correct is important for interpreting your data correctly.

When measuring rocket engine thrust you have lots and lots of corrections to the raw data that you measure with your load cells.  This is because, in truth, the gimbal bearing is not the only connection between the engine and the test stand.  While you’d really like to have that perfectly free-floating platform situation, you’ve got to have, for example, propellant feedlines hooked up to the engine.  Flexible bellows are built into the line so that they’re not completely stiff and thereby interfering with the movement of the platform, but they still absorb some of the thrust load and, therefore, make the raw thrust reading skewed.  There are a number of other such corrections that need to be made such that the whole calculation process related to tares can get a bit cumbersome with all its many pieces, but nobody ever said that developing rocket engines was supposed to be easy, right?

Now, between this article and the previous one, you have a good idea of how we get basic performance data from rocket engine testing and also the necessary configuration of the test stands that allow us to gather this information.  The smoke and fire and rumbling roar of an engine test is all very impressive, but for us Datadogs, it’s the data that matters most.  We get lots and lots of data from every test, but propellant flow rates and engine thrust are the most important in terms of understanding how an engine fits into a vehicle and a mission.

J-2X Extra: What's in a Name?

It’s been over six years since I started working on the J-2X development effort.  I missed the very first day that the notion of a J-2X engine was conceived, but I was only two weeks late to the party.  So, I’ve been with the thing almost from the beginning.  And throughout that entire period, whenever I get the chance to talk to people outside of our small, internal rocket engine community (…for very understandable reasons, they don’t let us out much), the single, most frequent, recurring, and ubiquitous question that I hear is something along the lines of this:

“How come you guys are spending so much time and effort recreating an engine that flew nearly fifty years ago?”

That is an entirely fair question.  I am not a volunteer.  As generous and as charitable as I like to consider myself, I do accept a paycheck.  So do my coworkers.  So does our contractor.  Thus, all this work to develop J-2X isn’t free and, as I said, the question asked is therefore a valid point of discussion.

To a certain degree, I tried to answer this question by way of analogy in a J-2X Development Blog article posted a year and a half ago (December 2010) about a 1937 Ford Pickup truck.  But analogies and metaphors can sometimes be abstruse.  Let us eschew obfuscation and arrive expeditiously to the point:  What makes J-2X different from J-2?

The J-2 rocket engine, developed by Rocketdyne and the NASA Marshall Space Flight Center, was qualified for flight in 1966.  Between August 1966 and January 1970, 152 engines were produced.  Between 1962 and 1971, some 3,000 engine tests were conducted.  The J-2 engines were used for the second stage of the Saturn 1B vehicle and the second and third stages of the Saturn V vehicle.  (Note that I wasn’t much involved in the original J-2 project considering that it was concluding just as I was figuring out that whole reading thing in First Grade.  Remember Dick and Jane, Sally and Spot?)

The most significant differences between these two engines can be found in their performance requirements.  I suggest that these are most significant because it is these differences that lead directly to a majority of the physical design differences between these two engines.

That’s an increase in thrust level of over 25%.  And the specific impulse increase is on the order of 6%.  While that doesn’t sound like much, in the realm of rocket engines, given that the J-2 and the J-2X are using the same power cycle, it’s huge.  It means that we’re pulling staged-combustion or expander cycle levels of performance from a gas generator engine.  That’s really something special.

From requirements flows form.  Or, as stated by architect Louis Sullivan (mentor to Frank Lloyd Wright): “Form follows function.”  You don’t design and build a rocket engine a certain way because it’s neato.  It’s designed to meet requirements that fulfill mission objectives.  It’s not like a 1959 Cadillac where stuff was added just because it looked really cool (picture below courtesy of the Antique Automobile Club of America Museum in Hershey, PA).

In order to get that kind of boost in performance for J-2X, we had to do two fundamental things:  (1) move more propellant mass through the engine, and (2) use that propellant more efficiently.  To the first point, J-2X pumps into itself and expels out approximately 20% more propellant per second than did J-2.  That translates into needing a whole lot more pumping power.  Here’s a comparison of power requirements for the J-2 and J-2X pumps (as a point of reference, a typical NASCAR engine generates about 750 horsepower):

That’s between 80% and 90% more power for J-2X as compared to J-2.  The reason that you need so much more is not only the need for greater flow, but also the need for more efficiency in usage is manifested as higher discharge pressures.  I’ll explain this further below.  But first, let’s talk about the hydrogen pump just because it’s an interesting story.

Back in the day, when J-2 was first being conceived of, the technology of how exactly to pump liquid hydrogen was still being developed.  The RL10 engine existed already, but it was about 1/10th the size of J-2.  Some work had been done with pumping hydrogen as part of the NERVA nuclear thermal propulsion development effort, but not everything learned there was widely distributed.  This relative lack of information resulted in J-2 having a liquid hydrogen pump that was, in reality, an axial compressor.  You see, the problem is that liquid hydrogen is so light that it kinda sorta acts as much like a gas as a liquid.  I’ve heard it described as being like whipped cream but less sticky. 

So, do you pump it like a liquid or like a gas?  You typically use axial compressors for gases.  That’s what you use in turbojets for airplanes.  And you can get it to work with liquid hydrogen, as J-2 clearly demonstrated, but it’s not the best solution.  One of the issues is that a compressor has some unfortunate stall characteristics where the effectiveness of the pump can plummet during the start transient.  This is caused by what is known as the start oscillation that always happens in liquid hydrogen engines.  Picture this:  Prior to start, everything up to the valves that hold back the flow on the hydrogen side is chilled down to liquid temperatures (typically 36 to 39 degrees Fahrenheit above absolute zero).  Then the valves open during start sequence and the liquid hydrogen suddenly comes into contact with relatively warm downstream metal.  The result is similar to what happens if you sprinkle water into a hot frying pan.  In other words, the liquid boils immediately upon contact.  In a rocket engine this causes a transient “blockage” as this voluminous plug of newly formed hydrogen gas gets pushed through the system.  In terms of the pump, this sudden “plug” downstream results in a transient, elevated pressure at the pump discharge and this can cause the pump to stall, especially if it’s an axial compressor.  In order to overcome this effect, they had to precede the J-2 start sequence with several seconds of dumping of liquid hydrogen through the whole system to pre-chill the metal downstream of the valves. 

Okay, so that’s not too much of a big deal, but it was a nuisance.  By the end of the 1960’s, it was clear to most folks that the better way to pump liquid hydrogen was to use a centrifugal pump and that’s the way we’ve done it ever since (including on the J-2S engine, which was an experimental engine tested in the early 1970s as a follow-on to J-2).  With a centrifugal pumps, you get to avoid the stall issues inherent with an axial compressor and you get a more compact, powerful machine.  Which is good considering how much more power we need to pull out of the pump for J-2X.

In addition to changing from axial to centrifugal, we had to make a number of other changes to the turbomachinery.  In one place, we used to use on J-2 an Aluminum-Beryllium alloy.  Well, you can’t use Beryllium anymore since it is considered too dangerous for the machinists working with the metal on the shop floor.  In particular, Beryllium dust is toxic.  And since we really like the guys working on the shop floor (as well as following the law), we had to go to another alloy.  Also, we redesigned internal seal packages and rotor bearing supports using the most modern analysis and design tools and methods.  In short, there’s not much in the turbomachinery, both fuel and oxidizer, that wasn’t reconsidered and redesigned to meet the imposed requirements.

Now, the other reason that we need 80% to 90% in addition to pumping 20% more “stuff,” is the fact that we had to get that stuff to higher pressures.  Why?  As discussed in a recent previous blog article, if we go to a higher combustion chamber pressure, then we can have a smaller throat and, with a smaller throat, we can have a larger expansion ratio without getting too out of hand with engine size.  And, because of our extreme specific impulse requirement (remember: form follows function), we need that very large expansion ratio.  So here are the top-level thrust chamber parameters:

The J-2 main combustion chamber was built from an array of tubes braze-welded together.  When you needed the walls of that chamber to be actively cooled, this was the most common way to make combustion chambers “back in the day.”  This is a fine method of construction, but it is kind of limited in terms of how much pressure it can contain.  For the Space Shuttle Main Engine project in the early 1970’s, we needed the capability to handle a much higher chamber pressure and so we (i.e., Rocketdyne working in coordination with NASA) developed what is called a “channel-wall” construction method.  So, to get the higher performance using the higher chamber pressure, we had to abandon the tube-wall construction method for the J-2X main combustion chamber and use a channel-wall main combustion chamber similar to the Space Shuttle Main Engine.

The main combustion chamber is on the top end of the scheme to get the larger expansion ratio.  On the bottom end, we had to add a large nozzle extension.  On the J-2, the nozzle consisted of another tube-wall construction.  For J-2X, we have a tube-wall section that is actively cooled and then we have the radiation-cooled nozzle extension beyond that.  The reason for transitioning is because the nozzle going out to a 92:1 expansion ratio has a diameter of nearly 10 feet and a tube-wall construction that large would be unreasonable heavy.  In other words, from the vehicle perspective, the engine would be so heavy that its weight would offset any benefit from performance.  The radiation-cooled nozzle extension is significantly lighter.

That make it sound easy, doesn’t it?  If you want more performance, just strap on a big hunk of sheet metal and call it a nozzle extension.  I wish that it were that easy.  First, you need to figure out what material to use.  Metal?  Or maybe carbon composite?  Plusses and minuses for both.  Then you need to learn how to fabricate the thing light enough to be useful.  And then you have to make it tough enough to survive the structural and thermal operating environments.  In the pictures immediately above you can see a sample panel of how the J-2X nozzle extension is made and you can also see one of these samples sitting in a test facility where we blasted the panel with high velocity hot gases to partially simulate nozzle flow environments.  The panel has a coating that enhances the radiation cooling so not only does the panel itself have to survive the environment, but so does the special coating.

Other things that we’re doing to get more performance out of the engine include the use of a higher density main injector and the use of supersonic injection of the turbine exhaust gases into the nozzle.  When you talk about “injector density,” what you’re talking about is the number of individual injectors stuffed into a given space.  Up to a point, the more injectors that you have, the better mixing you get, and, from that, the better performance you an extract from the combustion process.  The picture below shows some testing that was done early on in the J-2X development effort to optimize the main injector density.

With regards to the turbine exhaust gas, on J-2 it was effectively dumped into the nozzle with the only intent being to not mess up the primary flow.  For J-2X, we carefully designed the exhaust manifold and internal flow paths to get as even a distribution as possible around the nozzle and, from there, we are injecting it into the flow through mini throats at supersonic velocity.  Here again we are extracting as much performance as we can given the simplicity of the power cycle.

The next element of the engine to consider is the thing that creates the power that drives the turbines…that spins the pumps…that feeds the injectors…that fill the chamber…that makes thrust.  In other words, I’m talking about the gas generator.

So, due to the increased power needs of the pumps, the gas generator has to flow twice as much propellant and at higher pressures through the turbines as compared to J-2.  The temperatures are pretty much the same since this parameter is mostly limited by material properties of the spinning turbine components.  In terms of “form following function” from a design and development perspective, these increased power requirements translated to the fact that gas generator used for J-2 was entirely inappropriate for J-2X.  It just wouldn’t work.  Rocketdyne had to design a new gas generator based upon work that they had done as part of the development of the RS-68 rocket engine (used on the Delta IV vehicle).  In the past, I’ve shown some pictures and even video of the whole development test series that we conducted to validate the design of our gas generator.  Below is a representative picture of our gas generator component test bed. 

Something not captured in the table of performance requirements way up above is the bevy of requirements imposed on the J-2X in terms of health monitoring and controls functionality.  These too resulted in differences between J-2 and J-2X. 

The J-2 engine had a sequencer to control the engine.  Yes, it consisted of solid-state electronics, but other than that it was pretty much like the timer on your washing machine.  The J-2X has an engine controller, which is a computer with embedded firmware and software that allows for a great deal of functionality in terms of engine control and system diagnostics.  Some of these diagnostics we call redlines.  These are specific limits that we place of measured parameters such that, should we break the limit, then we know that something bad has happened to the engine.  The idea is to catch something bad before it turns into something potentially catastrophic.  This is all part of the higher reliability and safety standards that have been applied to J-2X as compared to J-2.

The J-2X controller is composed of two independent channels such that if one fails, the other can take over.  For critical measurements that inform the controller during engine operation, we actually take four separate measurements, compare them to make sure that they’re reasonable and good, and then use algorithms to perform the health checks.  That’s one result of the imposition of more detailed requirements pertaining to reliability and safety.  Along these same lines, we also have a number of design, construction, and workmanship standards that were applied to every aspect of the J-2X engine design, development, and fabrication.  These standards, in combination with more evolved and advanced analysis tools, have, in a number of cases, further driven design changes away from heritage J-2 designs to what we’d call modern human-rated spaceflight hardware.

In an old J-2 manual, I found reference to a reliability value for that engine equivalent to 2,000 failures per one million missions.  The requirement for J-2X is 800 failures per one million missions and, of those, only 200 can be “uncontained failures” meaning that the engine comes apart and potentially threatens other vehicle elements.  So, all over the engine system we’re pushing more propellants, operating at higher pressures, generating more thrust, and squeezing out more performance efficiency, and we have to do this in a manner that results in an engine that has over twice as reliable as the heritage design.  The result is an engine that is bigger and heavier than its historical antecedent:

So, in summary, here are the components that we had to change to meet J-2X requirements:
• Turbomachinery
• Main injector
• Main combustion chamber
• Nozzle
• Gas generator
• Added a nozzle extension
• Swapped the sequencer with a controller

What does that leave?  Valves?  Nope.  Because of the higher flowrates and pressures, we had to drop the heritage designs for the valves and go to a design more akin to the Space Shuttle Main Engine.  Ducts?  Nope.  Once you’ve changed all of these other things, you end up rearranging the connecting plumbing just as a matter of course.  Even the flexible inlet ducts were changed slightly to accommodate more stringent design standards. 

Form follows function; function flows from requirements; requirements flow from mission objectives.  Different mission, different requirements, different function, and a different result.  Thus, the J-2 and the J-2X share a name and share a heritage — in many ways the J-2 (and the J-2S) was the point of departure for the J-2X design — but the J-2X is truly its own engine.  Lesson learned: Don’t assume too much from a name.


Inside The J-2X Doghouse: Beyond the Gas Generator Cycle

Okay, I admit it: I’m a sucker for the Olympics.  I watch with rapt attention to sporting events that I would otherwise never consider viewing other than under the once-every-four-years heading of the Olympics.  Why is that?  Perhaps that is somehow a measure of my shallowness as a sports fan.  Nevertheless, I was truly on the edge of my seat watching the women’s team archery semi-finals and finals.  Great drama.  Wonderful competitors.  Exceptional skills.  Bravo ladies!

Another thing that I find fascinating about the Olympics is the fact that it brings together such a broad range of people.  No, I’m not going to trail off in a chorus of Kumbayah.  You simply cannot deny, however, that during the opening ceremonies you see people of every possible color and shade, from every corner of the planet, straight hair, curly hair, black hair, blonde hair, red hair, eye colors to fill a rainbow, and most startlingly, such an amazing collection of body types.  These are all world-class athletes and yet they’re often so different from each other.  I like seeing the six-foot-seven volleyball player walking next to the four-foot-ten gymnast.  I like seeing the contrast of the marathoner and the shot-putter.  We’re all the same species, but, my goodness, we come in an amazing array of shapes and sizes and various accoutrements.

The Pivot to Topic
Rocket engines, too, come in an array of shapes and sizes and various accoutrements (…I bet that you were wondering when or how I’d turn the conversation on topic).  I know that this is a blog dedicated nominally to J-2X development, but I think that it’s important to understand where the J-2X fits in this family of rocket engines.  So, let’s start with a table of top-level engine parameters:

Note that is list is nowhere close to being comprehensive.  There are lots and lots of rocket engines out there including those currently in development or in production and many that have been retired (like the F-1A in the table).  And if you open the window a little wider to include engines originating from beyond our shores, then you’ve got many more Soviet/Russian, European, Japanese, and Chinese engines to consider.  All I want to do here is expose you to some basic yet significant differences between this small set of examples.  Interestingly, if you can understand these few engines, then you can understand most of rest of the ones out there as variations on these basic themes.

Please allow me to introduce you to the engines listed in the table. 
• Of course, the J-2X needs no further explanation for anyone who reads this blog regularly. 
• The RL10 is a small engine that has been the product of Pratt & Whitney since the late 1950’s.  Over the past sixty years it’s evolved and matured.  It was actually used on a NASA vehicle back in the 1960’s, the Saturn I launch vehicle upper stage (S-IV).  Today it’s used, in different variants, as an upper stage and in-space engine for both the Atlas V and Delta IV launch vehicles. 
• The RS-25 is another name for the Space Shuttle Main Engine (SSME).  The development of the SSME began with research efforts in the late 1960’s, using a great deal of knowledge gathered from the development of the original J-2, and it was first tested in 1975 and first flew on STS-1 in 1981.  The RS-25 engine is now designated to be the core stage engine for the next generation of launch vehicles under the Space Launch System (SLS) Program. 
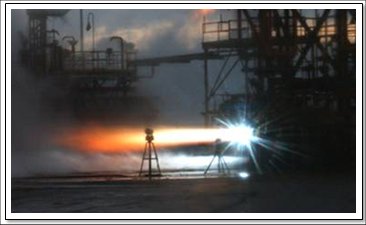
• The F-1A was an upgraded version of the F-1 engine that powered the first stage (S-IC) of the mighty Saturn V launch vehicle that first took man to the Moon.  The F-1A was a more powerful version of the F-1 with a handful of design changes intended to make it cheaper yet more operable and safe.

The Key is in the Power
In a blog article here over a year and a half ago, I introduced you to the gas generator cycle engine.  The key philosophical point discussed in that article about what makes a rocket engine an engine is the fact that it feeds and runs itself.  It does this by finding a means for providing power to the pumps that move the propellants.  The origin for this power is the key to any rocket engine cycle.  In a gas generator engine, this power is generated by having a separate little burner that makes high-temperature gases to run turbines that makes the pumps work.  Below is a schematic for such a system.  You’ve seen this schematic before and it is very much like J-2X.
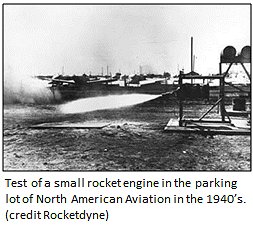
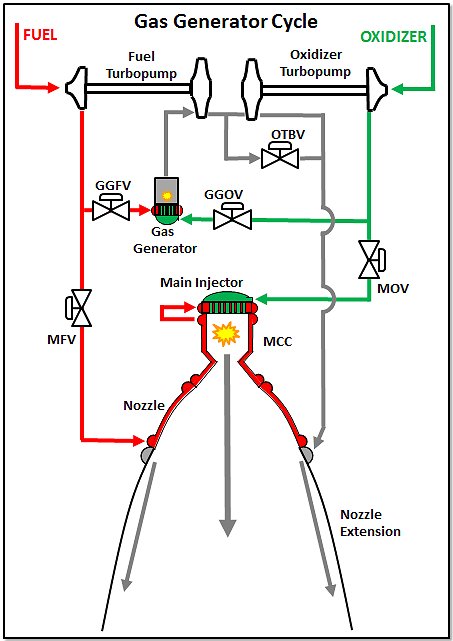
Where:
      MCC = Main Combustion Chamber
      GG = Gas Generator
      MFV = Main Fuel Valve
      MOV = Main Oxidizer Valve
      GGFV = Gas Generator Fuel Valve
      GGOV = Gas Generator Oxidizer Valve
      OTBV = Oxidizer Turbine Bypass Valve

Behold Now Behemoth
The F-1A power cycle is similar to the gas generator cycle shown above in that it is still a gas generator cycle, but rather than two separate turbopump units, there was only a single (huge) unit that contained both pumps.  So, a single turbine was used to power both pumps rather than having two separate turbines like J-2X.  Going back to the table, you will see that the F-1A was different from the J-2X also in the fact that the propellants were different.  The J-2X uses hydrogen for fuel and the F-1A used RP-1 (FYI, RP-1 stands for “rocket propellant #1” and is actually just highly purified, high quality kerosene).  The chief difference between hydrogen and kerosene is chemistry.  A hydrogen-fuel engine will get higher specific impulse than a kerosene-fuel engine but kerosene engines have the distinct advantage of being able to generate more thrust for a given engine size.  With a kerosene engine, you are simply throwing overboard more massive, high-velocity propellants in the form of combustion products.  Hydrogen is light and efficient from a “gas mileage” perspective but kerosene gets you lots and lots of oomph.  That’s why you typically use it for a first stage application like on the Saturn V vehicle.  You want to have lots of oomph to get off the ground.  Later, on the upper stages, you can better use the greater gas mileage afforded by hydrogen.

Note, however, that you could theoretically build a hydrogen engine as large as the F-1A in terms of thrust.  The RS-68 (also a gas generator cycle engine) on the Delta IV vehicle puts out around three quarters of a million pounds-force thrust so that’s pretty big.  Also, back in the 1960’s, there was conceptual design work performed on an enormous hydrogen fuel, gas generator cycle engine called the M-1.  On paper, that behemoth put out 1.5 million pounds-force of thrust just like the F-1 on the Saturn V.  But that project was abandoned and here’s why: hydrogen is very, very light so if you want to carry any appreciable amount, you need to have truly huge tanks.  Huge tanks mean huge stages.  Huge means heavy.  Eventually it becomes a game of diminishing returns at the vehicle level.

What this discussion of J-2X and F-1A (and RS-68 and even M-1) shows you is the extreme versatility of the gas generator cycle.  It can be used with nearly any reasonable propellant combination and it can be scaled from pretty darn small to absolutely enormous.

Shaving with Occam’s Razor
Occam’s Razor is the notion that one should proceed with simplicity until greater complexity is necessary.  Along these lines, I will introduce you to a simpler engine cycle: the expander cycle.  For this engine cycle, you do not use a gas generator to drive your turbine(s) so you don’t have a second, separate combustion zone apart from the main combustion chamber.  That makes everything simpler.  Instead, you use only the heat gathered in the cooling the thrust chamber assembly (i.e., the main combustion chamber walls and that portion of the nozzle regeneratively cooled).  See the schematic below.

See?  I got rid of not just the gas generator but also the two valves that fed the gas generator.  That’s huge in terms of simplification.  And whenever you can make an engine simpler you’ve usually made it cheaper and more reliable just because you have fewer things to build and fewer things that could break.  Cool!

Here, however, is the problem: How much power do you really have just from the fluid cooling the walls?  The answer can be found by looking at the table and seeing, for example, the RL10 thrust output is less than one-tenth of J-2X.  You just can’t pull that much energy through the walls.  There have been attempts to increase heat transfer by various means including making the main combustion chamber longer than typical so that you have more heat transfer area or even by adding nubs or ridges onto the wall to gather up more heat.  Using the longer chamber notion, the European Space Agency is working on an engine called the Vinci that almost doubles the thrust output from the RL10, but getting much further beyond that is darn tough.  Also note that hydrogen is a wonderful coolant based upon its thermodynamic properties.  Being a wonderful coolant means that it picks up a lot of heat.  It is difficult to imagine using the expander cycle engine with another fuel beside hydrogen (though maybe methane might work … haven’t examined it). 

On the plus side, in addition to the simplicity, what the cycle shown offers is what is called a “closed cycle” meaning that no propellants are thrown overboard other than through the main injector.  In a gas generator cycle engine, after the gas generator combustion gases pass through the turbine(s), it’s dumped into the nozzle (or, in other schemes, dumped overboard in other ways).  Any propellants or combustion products that do not exit the rocket engine through the main injector and through the main combustion chamber throat represent an intrinsic loss in performance.  “But,” you’ll say, “the specific impulse for the RL10 and the J-2X in the table are the same.”  Well, that’s a little bit of apples and oranges because it’s based upon the nozzle expansion ratio.  Another model of the RL10, the B-2, has a much larger nozzle extension and the vacuum specific impulse for that model is over 462 seconds (minimum).  The European Vinci engine that I mentioned above has a projected vacuum specific impulse of about 465 seconds.  Those are darn impressive numbers that make the mouths of in-space stage and mission designers drool.

A couple of final notes about the expander cycle engine.  First, the RL10 is not quite like the schematic shown.  It only has one turbine with one pump driven directly and the other pump driven through a gear box.  Thus, the OTBV goes away (making it even simpler!).  Second, there are versions of the expander cycle engine concept that are not closed cycles.  In these versions, you dump the turbine drive gas overboard in a manner similar to what you do in a gas generator cycle.  You are still using the heat from the chamber walls to drive the turbine(s), so it’s still an expander, but with an overboard dump you can also leverage a larger pressure ratio across the turbine(s) and thereby get a bit more oomph out of the cycle.  You sacrifice a bit of performance for more oomph.  The Japanese LE-5B engine is an open expander cycle engine like this (also called an “expander bleed” cycle).

“We do these things not because they are easy…”
So, you’ve seen the incredibly versatile gas generator cycle engine.  And, you’ve seen the simple yet limited expander cycle engine.  So what do you do if you say, “The heck with it, I want the Corvette”?  What if you want a closed cycle, high performance engine not limited to lower thrust levels and you’re willing to accept consequent greater complexity?  The answer is staged combustion.  Below is a simplistic schematic for a staged-combustion engine.

Where:
      CCV = Coolant-Control Valve
      PBOV = Preburner Oxidizer Valve

In a staged combustion cycle engine, we rename the gas generator and call it the “preburner.”  The biggest difference between a gas generator cycle and a staged combustion cycle is what you do with the turbine exhaust gases.  In a gas generator cycle, the turbine exhaust gases effectively get dumped overboard.  In a staged combustion cycle, the turbine exhaust gases get fed back into the main injector and get “burned again.”  This is possible since the combustion in the preburner is off from stoichiometric conditions, meaning that in addition to combustion products you also have lots of leftover propellant (either fuel or oxidizer depending on the scheme). The leftover propellants from the turbine exhaust then become part of the mix of propellants in the main combustion chamber.

That sounds simple, right?  It’s just a twist on the gas generator cycle theme, right?  Well, there are larger implications.  First, think about the pressure drops through the system.  On a gas generator cycle engine, the pressure in the gas generator can be lower than the main chamber.  After all, the downstream side of the turbine(s) is effectively ambient, external conditions.  In a staged combustion cycle, the preburner pressure has to be substantially higher than the main chamber pressure sitting downstream of the turbine(s) or you don’t get enough flow to power the turbine(s).  Insufficient turbine power and the cycle doesn’t work.  So, in general, a staged-combustion cycle engine has higher system pressures than a gas-generator cycle engine of comparable size.  Next, think about starting the system.  In a gas generator cycle engine, the two combustion zones are effectively disconnected.  In a staged combustion cycle engine, the two combustion zones are on either side of the turbine(s) so there is effectively communication between these two zones.  Now, try to imagine getting these two combustion zones ignited and up to pressure and the turbine(s) spun up to speed in an orchestrated manner during the start sequence.  It ain’t easy.

So, what do you get for this complexity and higher operating conditions?  Well, you get a closed cycle, high performance, and high thrust engine design choice.  The RS-25 (SSME) is the American example of such an engine.  If you put a higher expansion ratio nozzle on the RS-25, just as with the RL10 discussion, the specific impulse value would be as much as ten seconds higher than J-2X.  However, if you go out and find a schematic of an SSME, what you’ll see is a heck of a lot more complexity than even I’ve shown in my simplified sketch.  Because the pressures are so high, there are actually four separate turbopumps and a boost pump in the SSME.  The design relies on putting pumps in series to achieve the necessary pressures and fluid flow rates through system.  And, the SSME has not one but two separate preburners, one for the high pressure fuel turbopump and one for the high pressure oxidizer turbopump.  It’s a very complex engine, but it has extraordinary capabilities.

The RS-25 (SSME) is a staged combustion cycle engine with hydrogen as the fuel.  The preburners are run fuel-rich such that the generated gases contain excess hydrogen for injection in the main chamber.  Back in the days of the Soviet Union, they developed a whole series of staged combustion cycle engines that instead used kerosene as the fuel.  In these engines, the preburner is run oxidizer-rich so that the gases run through the turbines and then through the main injector have excess oxidizer to be used for final combustion in the chamber.  The Russian-supplied RD-180 that is currently used for the Atlas V launch vehicle is an example of such an engine.  It too is an extremely complex, high pressure, and high performance engine.

So, staged combustion cycle engines are not easy.  Their complexity and operating conditions suggest, generically, greater expense and lower reliability.  But if you can make the trade-off between high performance and the adverse issues, then they can function quite impressively.  Nearly thirty years of Space Shuttle flights are an indisputable demonstration of this fact.

Just One Bolt
Can you imagine opening a hardware store and selling just one kind of bolt?  That would be it.  One brand.  One diameter.  One length.  And just one bin full of identical versions of this one bolt in your store.  It sounds really kind of stupid.  The unavoidable truth is that you need different bolts for different applications.  It’s kind of like trying to imagine telling the Olympic gymnastics team that they now had to play basketball and the basketball players to do gymnastics.  I don’t know about you, but I’d love to see Lebron James have a go at the pommel horse.

Well, over the last fifty-plus years, we’ve developed different rocket engines and rocket engine concepts for a variety of different applications.  Just one design does not fit all applications.  Each design has advantages and disadvantages.  If you can understand the basics of what I’ve discussed in this article, however, then you will have a fundamental understanding of at least 90% of the engines spanning that fifty-plus years of history.  And that, in turn, might help you better appreciate why one bolt is chosen over another or why, for example, shot-putters tend to be a bit more beefy than cyclists.