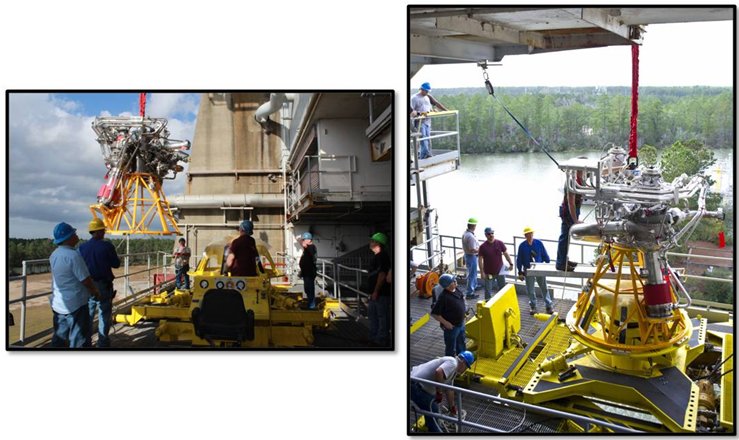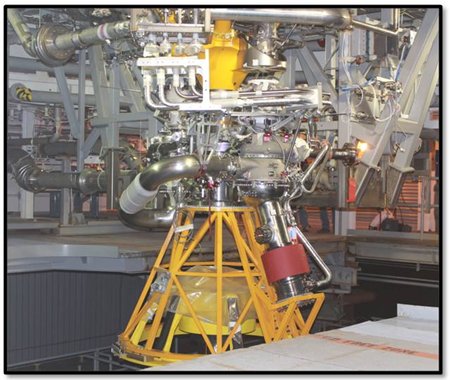
The Gap Band, 1982! Yep, just recalling those wise lyrics and the electrofunk music of my youth and I’m up and dancing and strutting around in my office like a goofball. Luckily, nobody is watching. So, is there a point to this opening other than imposing on you the painful image of a middle-aged bureaucrat getting down and getting funky in his office? Yep, there is. Here it goes: The next J-2X Engine 10001 will be a bomb test.
You read that correctly: Bomb Test.
Now, I could probably weave a complex and fanciful tale explaining how “bomb test” is really just a creative government euphemism, but we’ve been straight with each other before, right? So, the truth is that for this next test we will be mounting into the main combustion chamber a 100% genuine bomb, a small explosive device. And, yes, we will detonate that device to set off an explosion.

Other than proving once again that we’ve got a cool job and that we’re really like a bunch of 14-year-olds who like to make loud smoke and fire, there is actually a technical reason for doing this. Way, way back in February, some 20 articles ago (“”-2X Extra: Shiny Metal Pieces”), I briefly mentioned the possibility of combustion instabilities in the gas-generator. I likened them to the melodious sounds from a pipe organ although combustion instabilities in rocket engines are far, far from melodious. Indeed, they can be dangerous and destructive. Our bomb test is a means for characterizing the combustion stability of the J-2X engine.
In order to understand combustion instabilities in a very general way, we have to take about a dozen steps backwards and get to some really basic physics. The issue comes down to one of natural frequencies and resonance.

Have you ever tried to push a kid on a swing? Almost immediately, instinctively, you know that there is a particular rhythm with the swing and if you push in concert with that rhythm, the magnitude of the swinging motion will be increased. If you try to push at a different rhythm, the kid just kind of sits there in the middle, bobbing around and getting annoyed. The swing has a natural frequency and if you match that frequency, you get a big response. That’s resonance. If you fight against it, your energies are dissipated without much else happening. Everyone can picture that, right? That’s a simple, common, shared experience. Good.
Next, we’re still going to use a rope, but in a little different manner. In the diagram below, you see someone – i.e., you – holding onto a rope that is secured to a wall. If you jiggle the rope with no rhythm (i.e., if you jiggle it kind of like how I dance to The Gap Band), not much happens. It will wiggle and move, but with no organized pattern. But very quickly, again almost instinctively, you can find the rhythm to make the rope define, back and forth, a single, graceful arc of movement. With a little practice, you can then jiggle the rope at exactly twice that first speed and get it to make the shape shown in the middle. And, if you’re really good, you can jiggle it at three times the speed of the first one and get the shapes shown on the bottom.
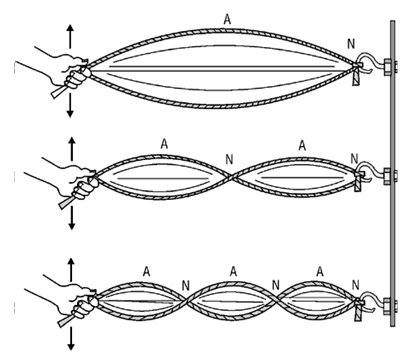
If you do this, you will have demonstrated the first, second, and third natural modes of the standing waves for that length and properties of rope. You cannot get those shapes by inputting any random jiggle on the end. You have to input a specific forcing function, tuned to a specific frequency, and you will get the desired results. Your forcing function must resonate with the mode. Just like with the kid on the swing, if you input the wrong forcing function, nothing much happens.
Another point to consider — in addition to considering the forcing function — is that the rope has particular characteristics that define its natural modes. But anyone who has ever picked up a guitar knows this, right? Each string is a different thickness, each is pulled tight to a particular tension, and by putting your fingers on different frets, you alter the effective length of the string. So, each string, when made the correct length and plucked, vibrates in its first natural mode to yield a particular note. Because the guitar string is fixed on both ends, what you get when you pluck it is like the top picture in the jiggled rope discussion, the first natural mode.
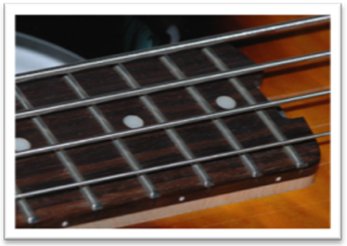
Now, we’re going to make the jump from wave shapes in ropes to pressure waves in air. Imagine rather than a string showing wave patterns, pressure variations in air. Can’t image that? Okay, then imagine someone talking to you. Sound travels via fluctuations of pressure in the air. When you talk, you tighten or loosen your vocal chords, make them vibrate like a guitar string, and sound emanates from that physical vibration turned into pressure variations in the air. This is the jump from structural vibrations to acoustics but it’s still dependent on the notion of waves and frequencies.
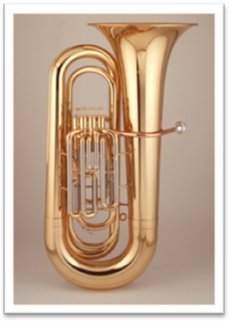
Okay, so rather than thinking about your vocal chords, imagine playing a trumpet. You make your lips vibrate in the mouthpiece and, at certain particular frequencies, you can make the trumpet sing clear, bright notes. You supply the forcing function; the forcing function matches a natural frequency of the column of air within the trumpet; and you create standing pressure waves that sound like music to everyone in the vicinity. Quite simple. And different instruments have different natural frequencies. A tuba will never sound like a trumpet. Why? Because it has a different natural frequency and responds differently to different forcing functions.
So, we started with a kid on a swing and now we’re talking about trumpets and tubas. And what does any of that have to do with a bomb in a rocket engine?
Let’s review. In our discussion we’ve learned that things have natural frequencies. A rope has a natural frequency. The space within a tuba has a natural frequency. Everything around you has natural frequencies. And we’ve learned that if you input a correct forcing function to a system, we can get organized results by working in conjunction with the natural frequencies. We can get resonance. A child swings high on the swing. A rope makes neato patterns when jiggled. A trumpet blares a high-C over the cheering crowd. Okay, so here’s the kicker: all this stuff that we’ve discussed is exactly what we DON’T want to happen in the rocket engine combustion chamber.
Just like any other semi-enclosed space, a combustion chamber has natural frequencies. These frequencies relate to all three dimensions in space (longitudinal, radial, and circumferential since chambers are typically cylindrical) and to the “stuff” in the space (for a tuba that “stuff” is air, in a combustion chamber it’s the propellants and, primarily, the combustion products). These characteristics together define many, many potential natural frequencies, or modes, where the chamber could “sing.” The forcing function is the combustion itself, which makes lots and lots of noise at many, many different frequencies and at extraordinarily great magnitudes all jumbled together. So, you have lots of potential modes and lots of very powerful, very high-energy forcing functions. Should these combine such that one feeds the other, then you could get resonance. Again, resonance is what happens when you push the kid in the swing at the right rhythm. But, taken to the extreme, a situation of resonance in an environment like a combustion chamber can continue to grow out of control until it becomes destructive.
Everyone’s favorite example of destructive resonance in practice was the Tacoma Narrows Bridge collapse in 1940. The bridge was a suspension bridge, which means that it was kind of like a long, heavy, hanging piece of rope made of concrete and steel. Well, it turns out that when the wind blew across the bridge at the right speed, it excited a natural mode of the hanging roadway. As the forcing function blew, the bridge oscillated in response, more and more, quite violently, until, ultimately, the structure crumbled into Puget Sound. These were not tornado-like winds. They weren’t even unusually high winds. They just happened to tune into the natural frequency of the bridge and the bridge responded by tearing itself apart.
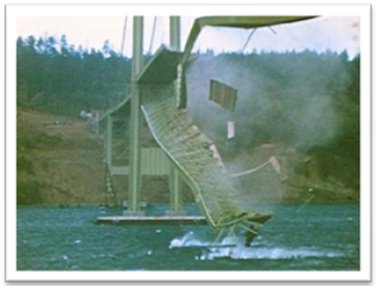
Lesson: Big vibrations can be destructive. The bridge was fine when it was built. It was fine for several months thereafter. But when the right forcing function came along, it was disaster.
This is as true in combustion chambers as it is for suspension bridges. In order to avoid this, we build into combustion chambers such things as acoustic cavities, which are sized cavities that are tuned so as to damp known natural frequency vibrations should they arise. We also use physical barriers across the faceplate of the injector so as to disrupt the establishment of radial or circumferential pressure wave patterns. These are features that we build into the design to help ensure that the space within the combustion chamber is not excited into any organized pattern that could build up to destructive levels. We simply don’t want the chamber to sing.
And this, finally, is where the bomb test comes in. We use this kind of test to help prove that the features we’ve included in the combustion chamber do indeed suppress the formation of destructive oscillations. During the test, we will set off the bomb. It will act as a broad spectrum forcing function with sudden input of energy. We need something as extreme as a bomb explosion to perform this energy input because there’s already so much energy being released in the combustion chamber. It’s not like we could toot a horn at it and try to find some particular frequency. That would be like trying to whisper to the person next to you while sitting in the fifth row of a rock concert. It ain’t gonna get through. So, we set off the bomb and if we have a mode lurking in the chamber that is not sufficiently suppressed by our design features, it ought to poke its head out of the noisy response that follows the explosion. We will analyze the pressure oscillation and structural vibration data and look for notes that might “sing.” We don’t expect any to be destructive based upon many years of design experience, but even if we identify any that don’t die down quickly we will have cause for further assessment.
To wrap this up, I will use one more image that helps me whenever we talk about “instabilities.” Through the whole discussion here, I’ve talked about vibrations and oscillations and natural modes and forcing functions and resonance, but what does that have to do with stability or instability?
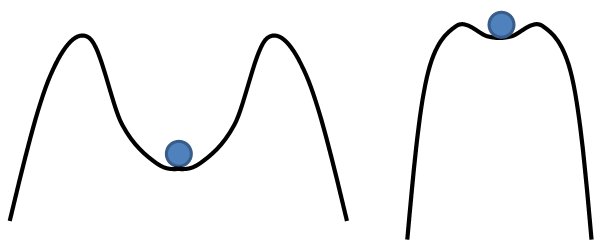
In the image above, I have drawn two situations of stability. In both cases there is a ball sitting at rest between two hills. For the ball on the left, if you perturb the ball slightly to the left or to the right, it will roll back to the middle and sit there peacefully. However, for the ball on the right, if I perturb it much in either direction, the ball will crest one of the hills and fall into oblivion. Thus, both situations shown are stable, but the one on the left is more intrinsically stable than the one on the right.
Similarly, the Tacoma Narrows Bridge was stable when it was built. But given the right perturbation, it was knocked out of valley of stability and became destructively unstable. Also, we know that the engine is stable. We’ve already run several tests and it’s been fine. While we don’t expect anything dramatic or destructive to happen on our upcoming test, this notion of “how stable” is what we’re examining with the bomb. We are using the bomb to knock the ball off the center of the valley and then we’ll measure how quickly it comes back to rest, i.e., how deep and steep is the valley of our stability. This is a measure and demonstration of the robustness of our engine design.


